Quick Start Guide
Get up and running with Email Assistant in minutes
What is Email Assistant?
Email Assistant helps you write professional, on-brand email responses in seconds. It connects with Gmail and uses the documents and context you upload to its back office to learn your company's voice, ensuring accurate and consistent replies for both individuals and teams.
Minimum Setup Required
To start using Email Assistant, you need to complete these three essential steps:
Step 1: Register in the Back Office
First, you need to create an account in the Email Assistant back office. You can register as an individual or as an organization.
👉 View detailed Registration & Login guide →
Step 2: Add AI Context
Add context and documentation to your Knowledge Base so the AI can generate accurate responses. You can manually upload files or add URLs to provide the AI with the information it needs to generate relevant responses.
👉 Learn about Manual Knowledge Base →
Step 3: Install and Use the Gmail Add-on
Install the Email Assistant add-on to your Gmail account and start generating AI-powered responses. The installation process is straightforward, and you can begin using it immediately after installation.
👉 View Test Installation guide →
👉 Learn how to use the add-on →
Tip: For best results, make sure to add comprehensive context to your Knowledge Base before using the add-on. The more context you provide, the better the AI responses will be.
Account Registration & Login
Register as an individual or organization to get started with Email Assistant
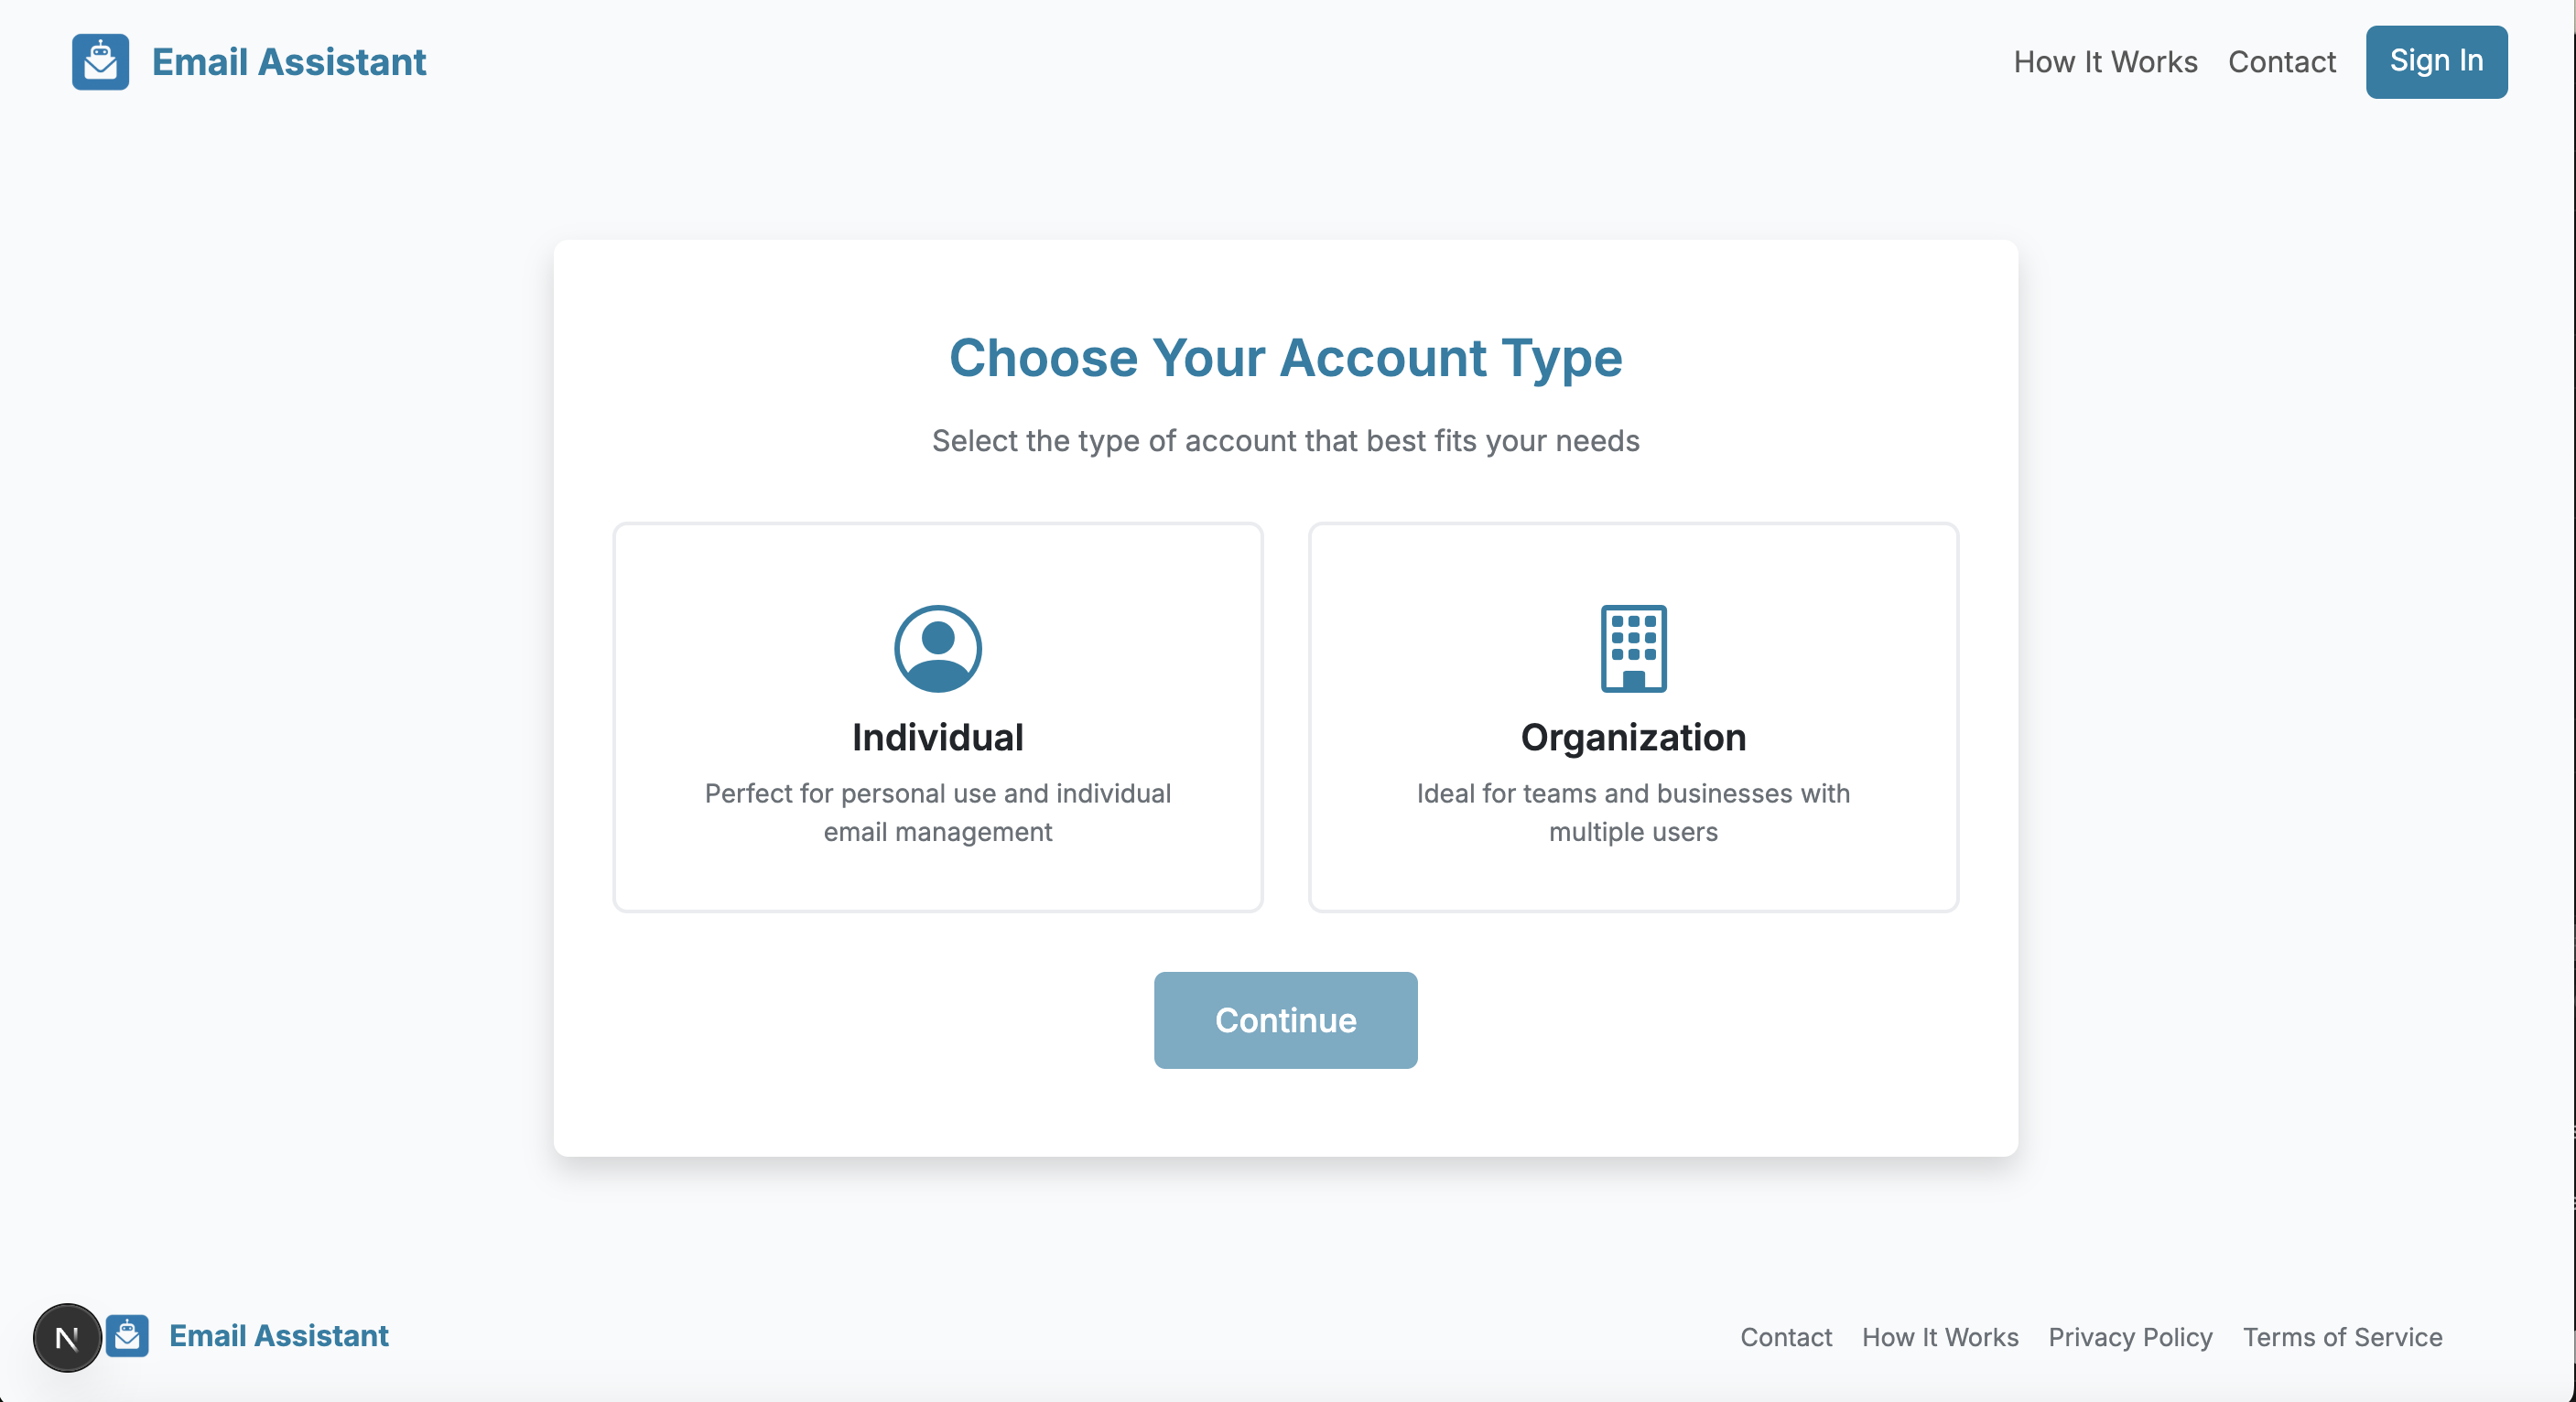
Registration Options
When you first access the Email Assistant, you can register in two ways:
- Individual Account: Perfect for personal use. Register with your Google account to get started immediately.
- Organization Account: Ideal for teams and businesses. Create an organization during registration to manage multiple users and settings.
Important: Email Assistant requires a Gmail account. Make sure you register using the Gmail account where you want to use the AI assistant.
Registration Process
- Navigate to the Email Assistant back office
- Navigate to the "Sign in" button on the nav header and then click the "Register link"
- Select your Google account (must be a Gmail account)
- If registering as an organization, fill in your organization details (name, domain, etc.)
- Grant necessary permissions
- You'll be redirected to the Admin Dashboard upon successful registration
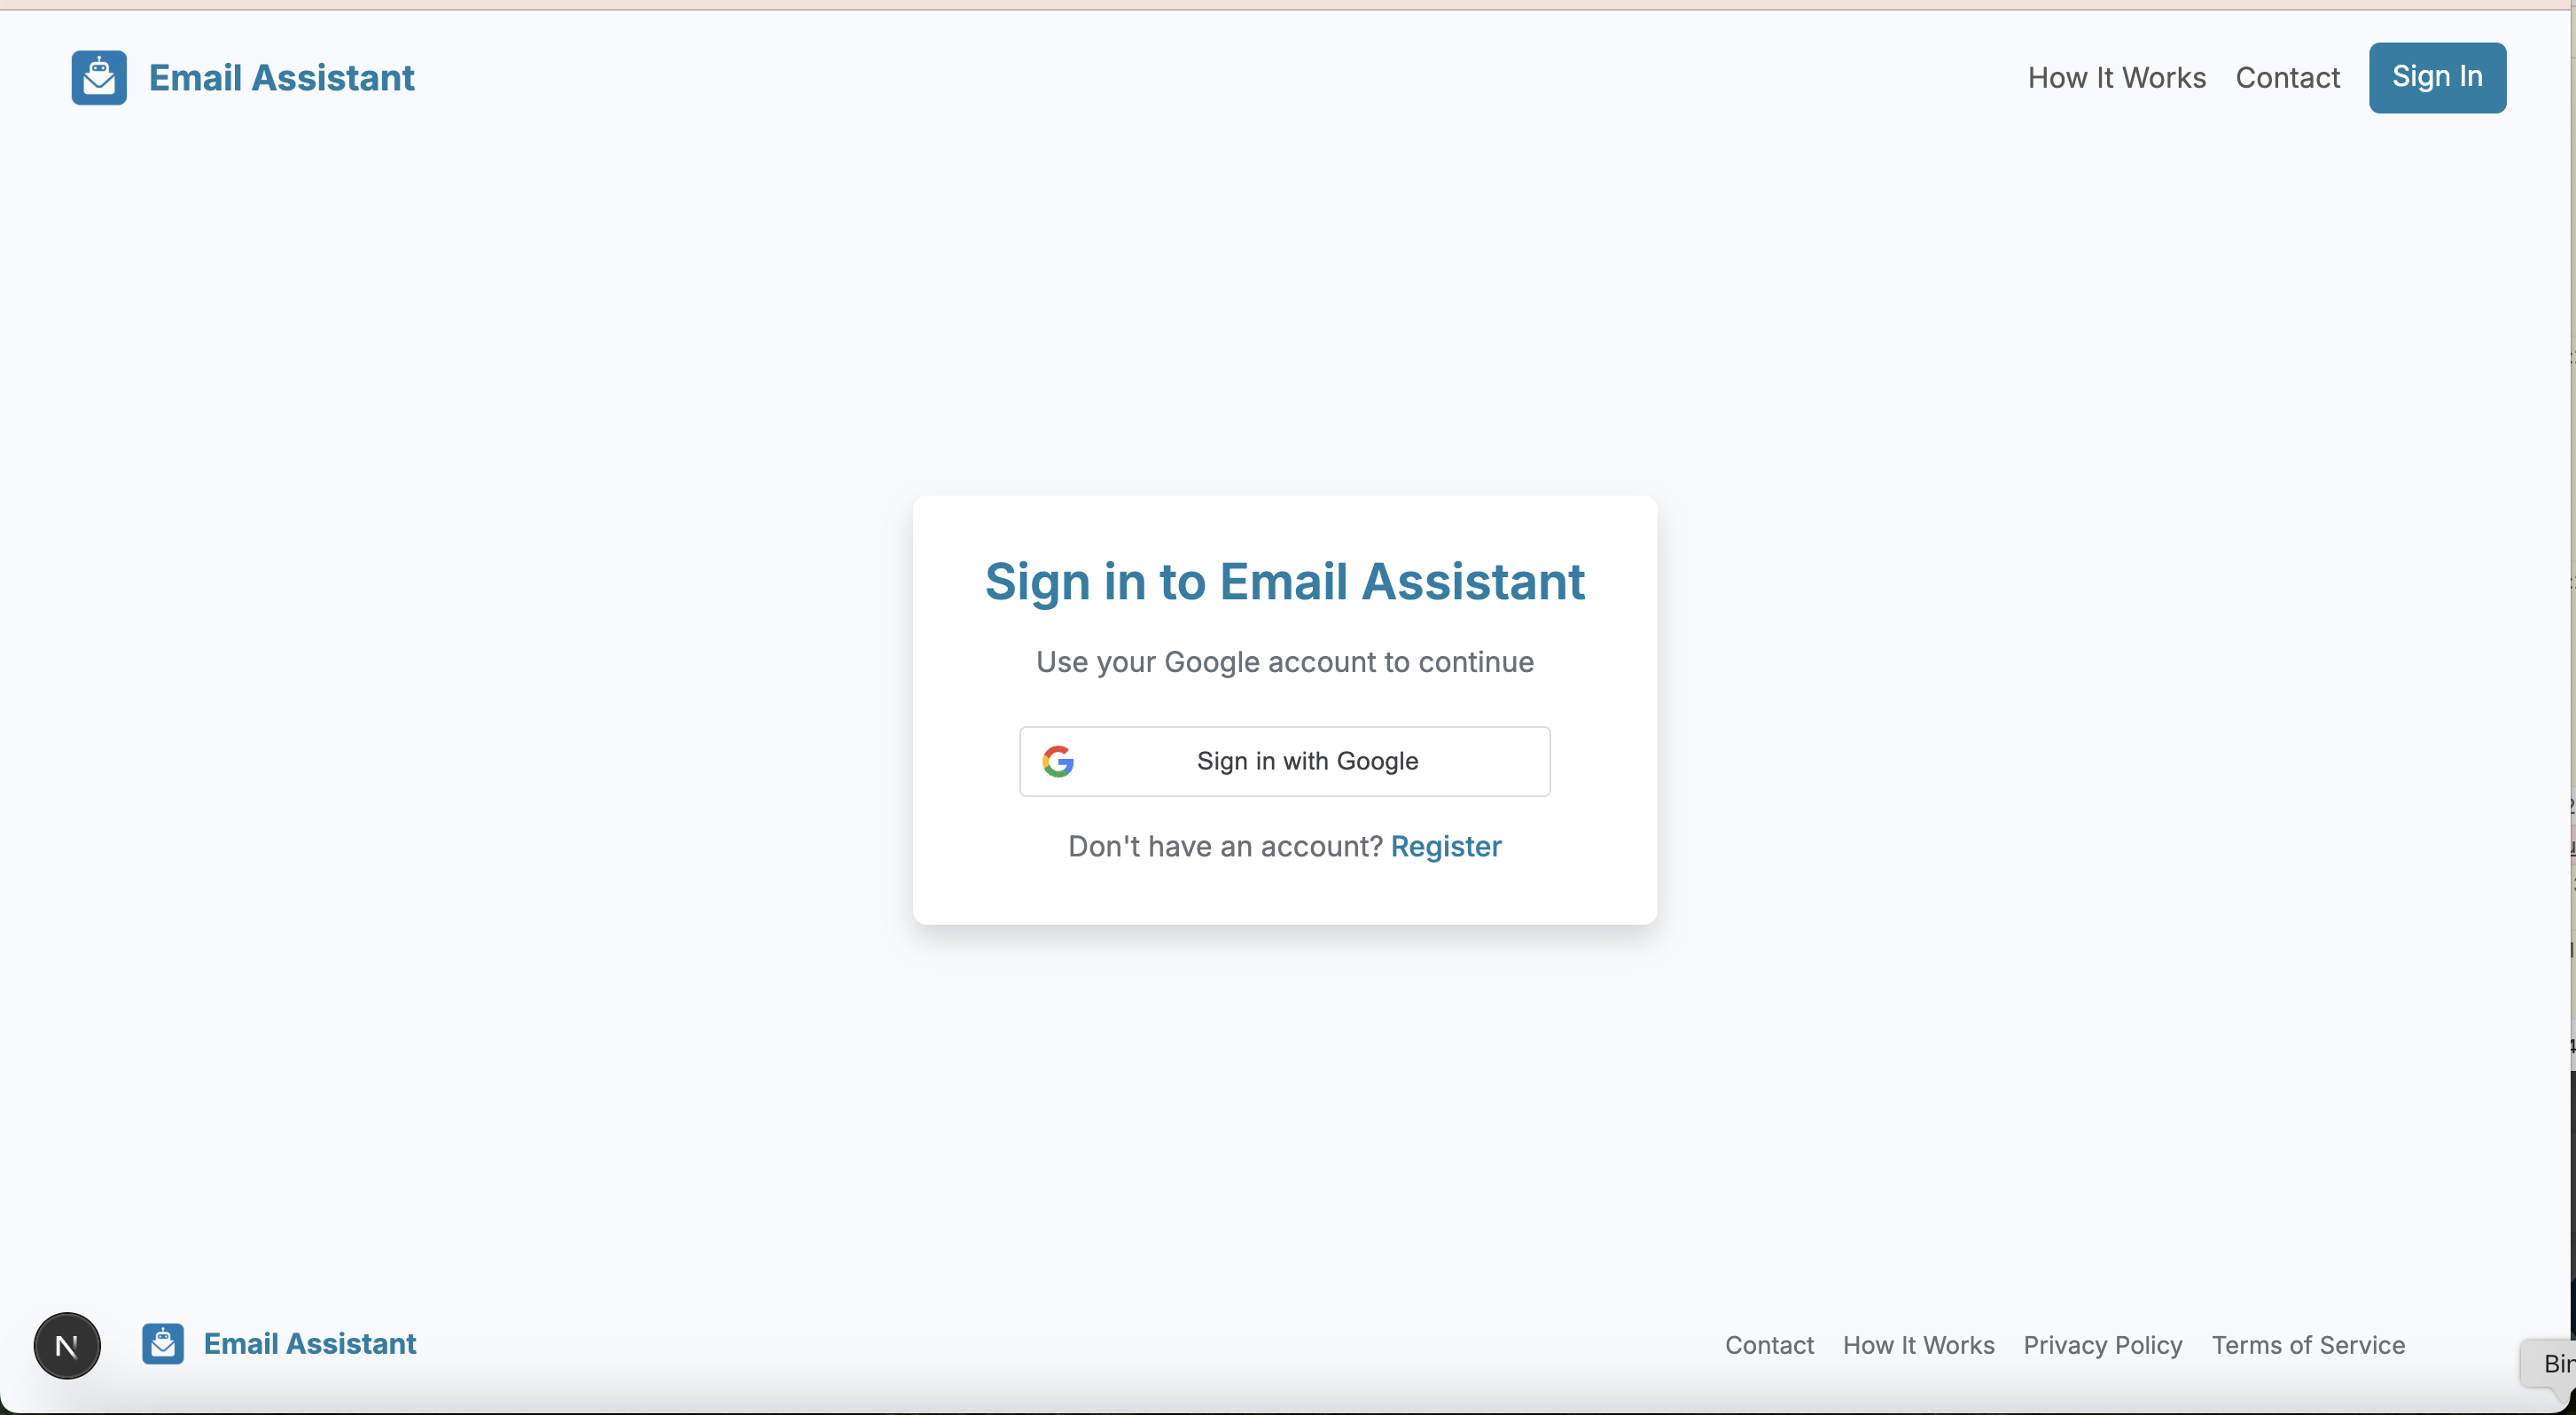
Login Process
- Visit the Email Assistant back office
- Click "Sign in with Google"
- Select your registered Google account
- You'll be redirected to the Admin Dashboard
Dashboard Overview
Your central hub with quick links to all admin features
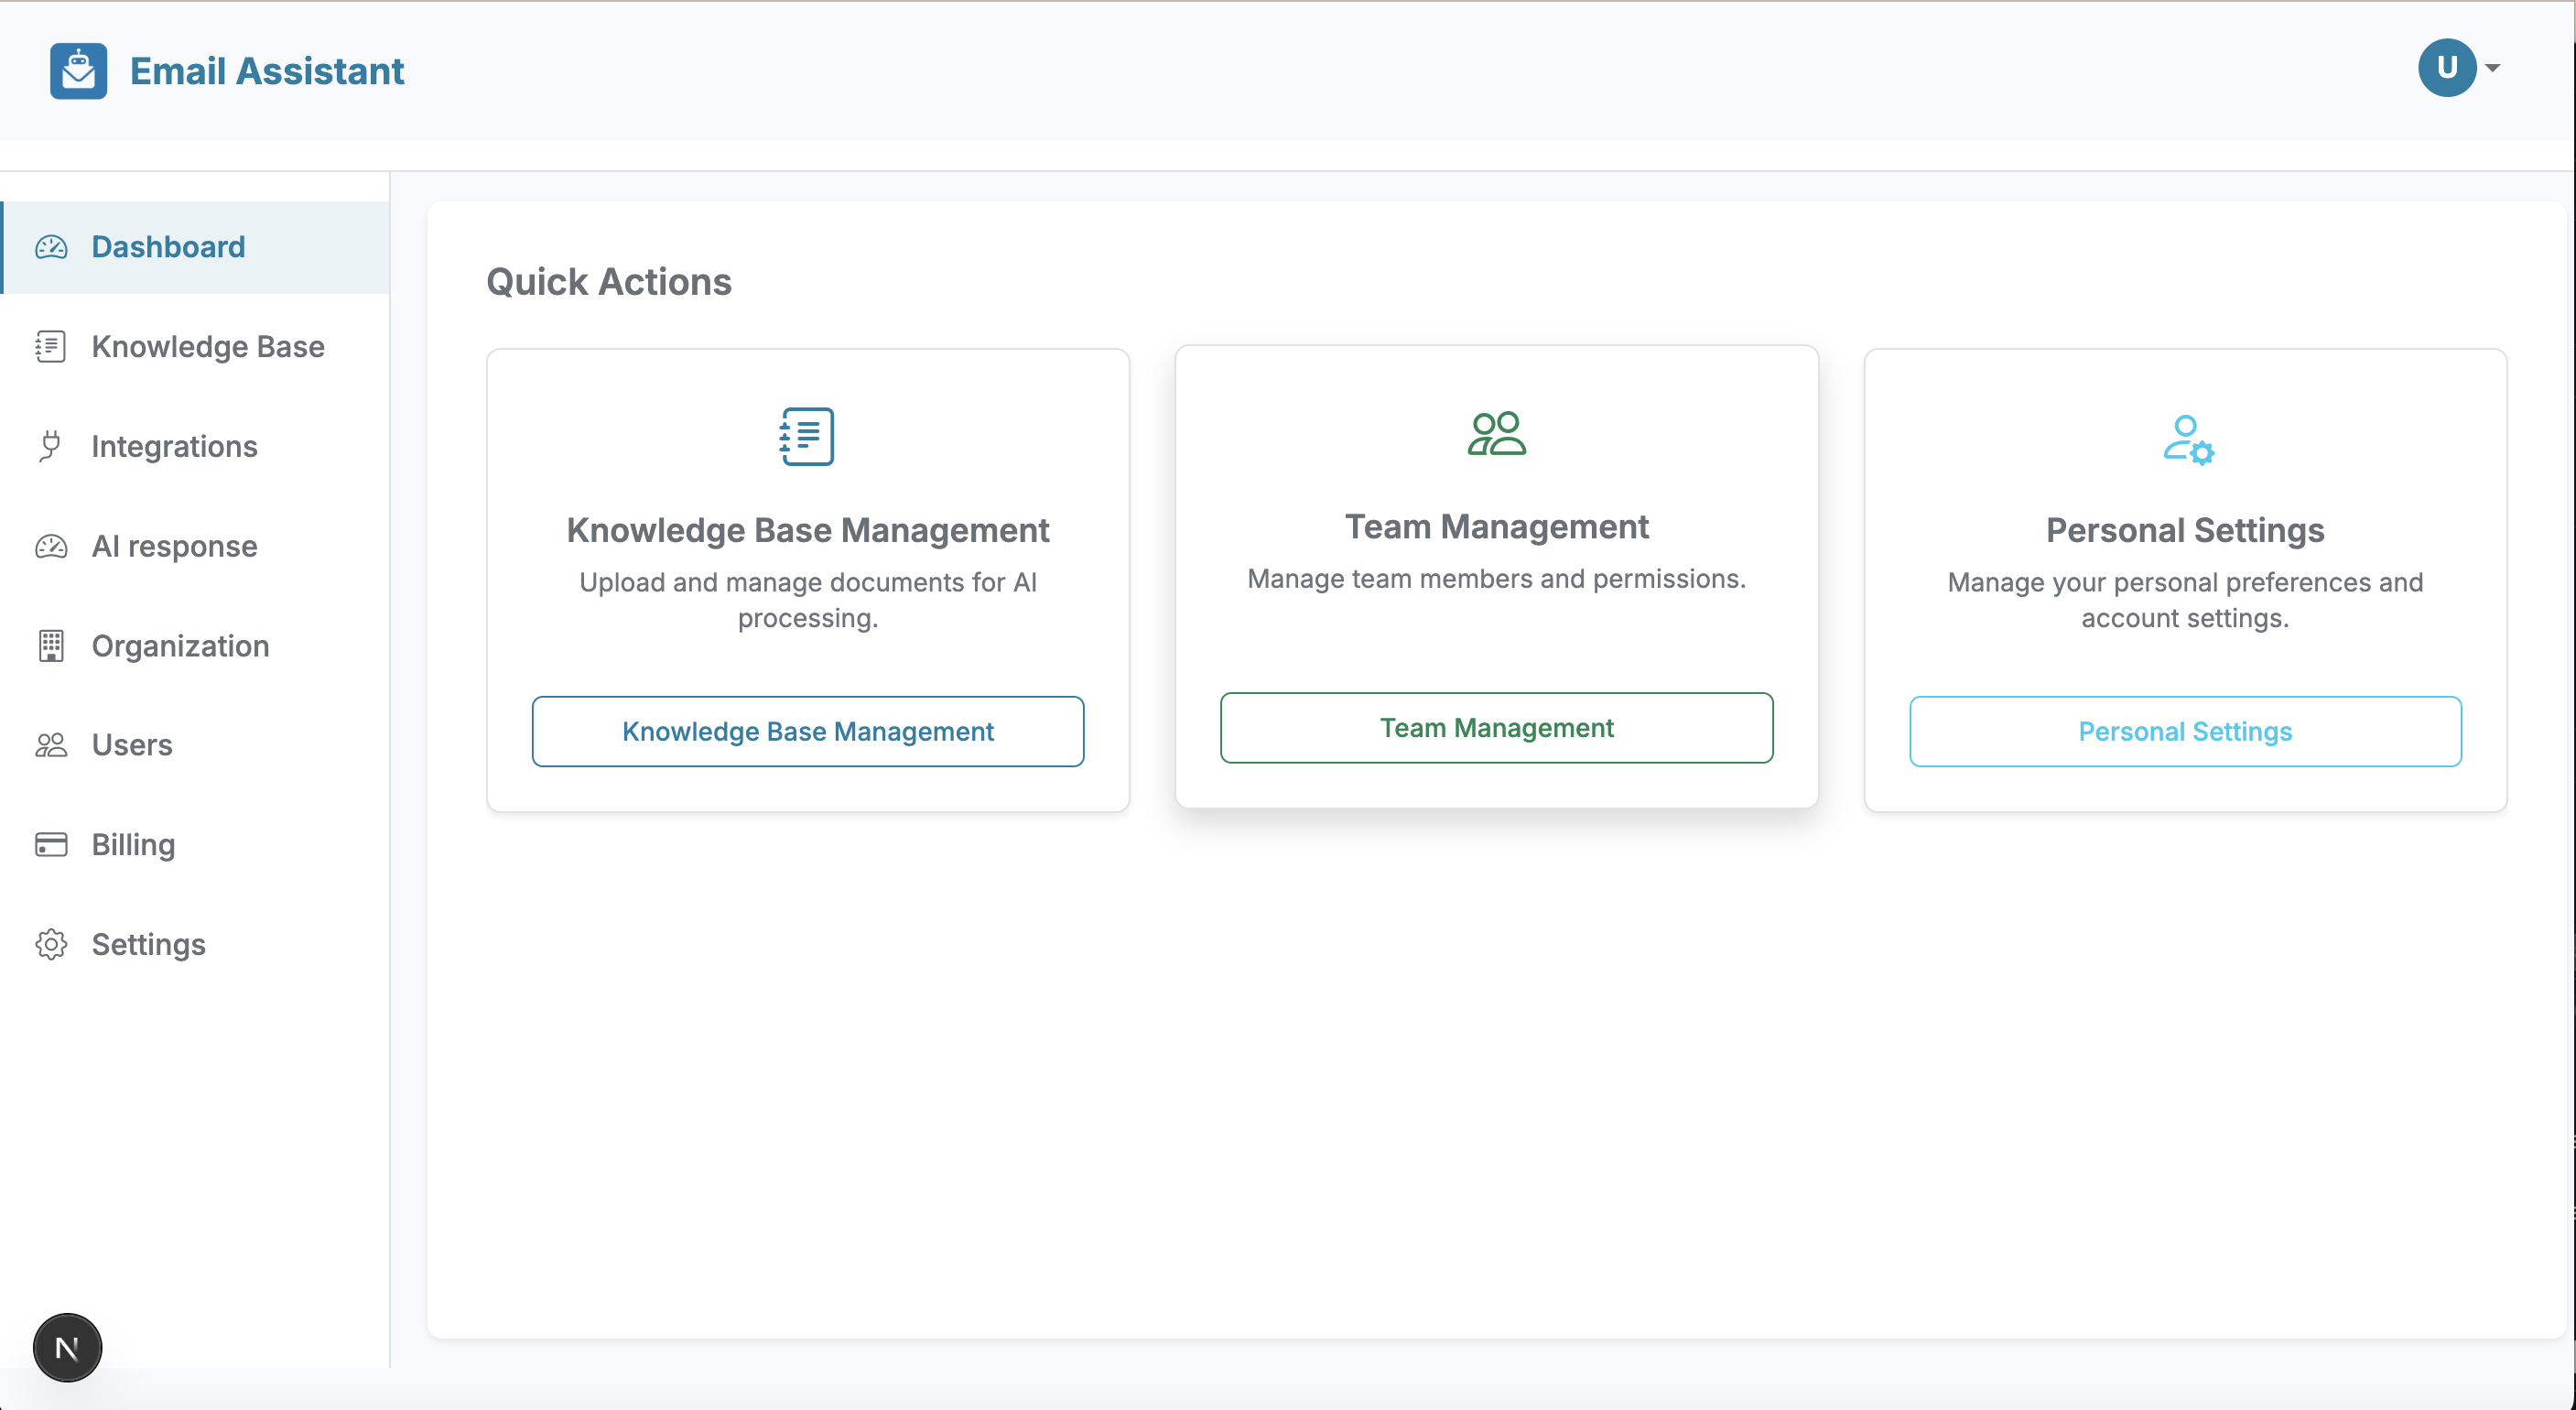
What is the Dashboard?
The Dashboard is your main landing page after logging in. The Dashboard contains quick links to other admin panel sections, allowing you to navigate quickly to any section without having to use the main navigation menu.
Knowledge Base (Manual)
Manually add context and documentation for AI-powered email responses
What is the Knowledge Base?
The Knowledge Base is a critical feature that allows you to provide context and documentation for the AI to use when generating email responses. This is where you add all the information, documents, and resources that help the AI understand your business, products, services, and communication style.
Why is it Important?
By adding content to your Knowledge Base, you ensure that the AI has access to accurate, up-to-date information when generating responses. This leads to more relevant, accurate, and helpful email replies.
Manual Methods to Add Content
You can manually add content to your Knowledge Base in two ways:
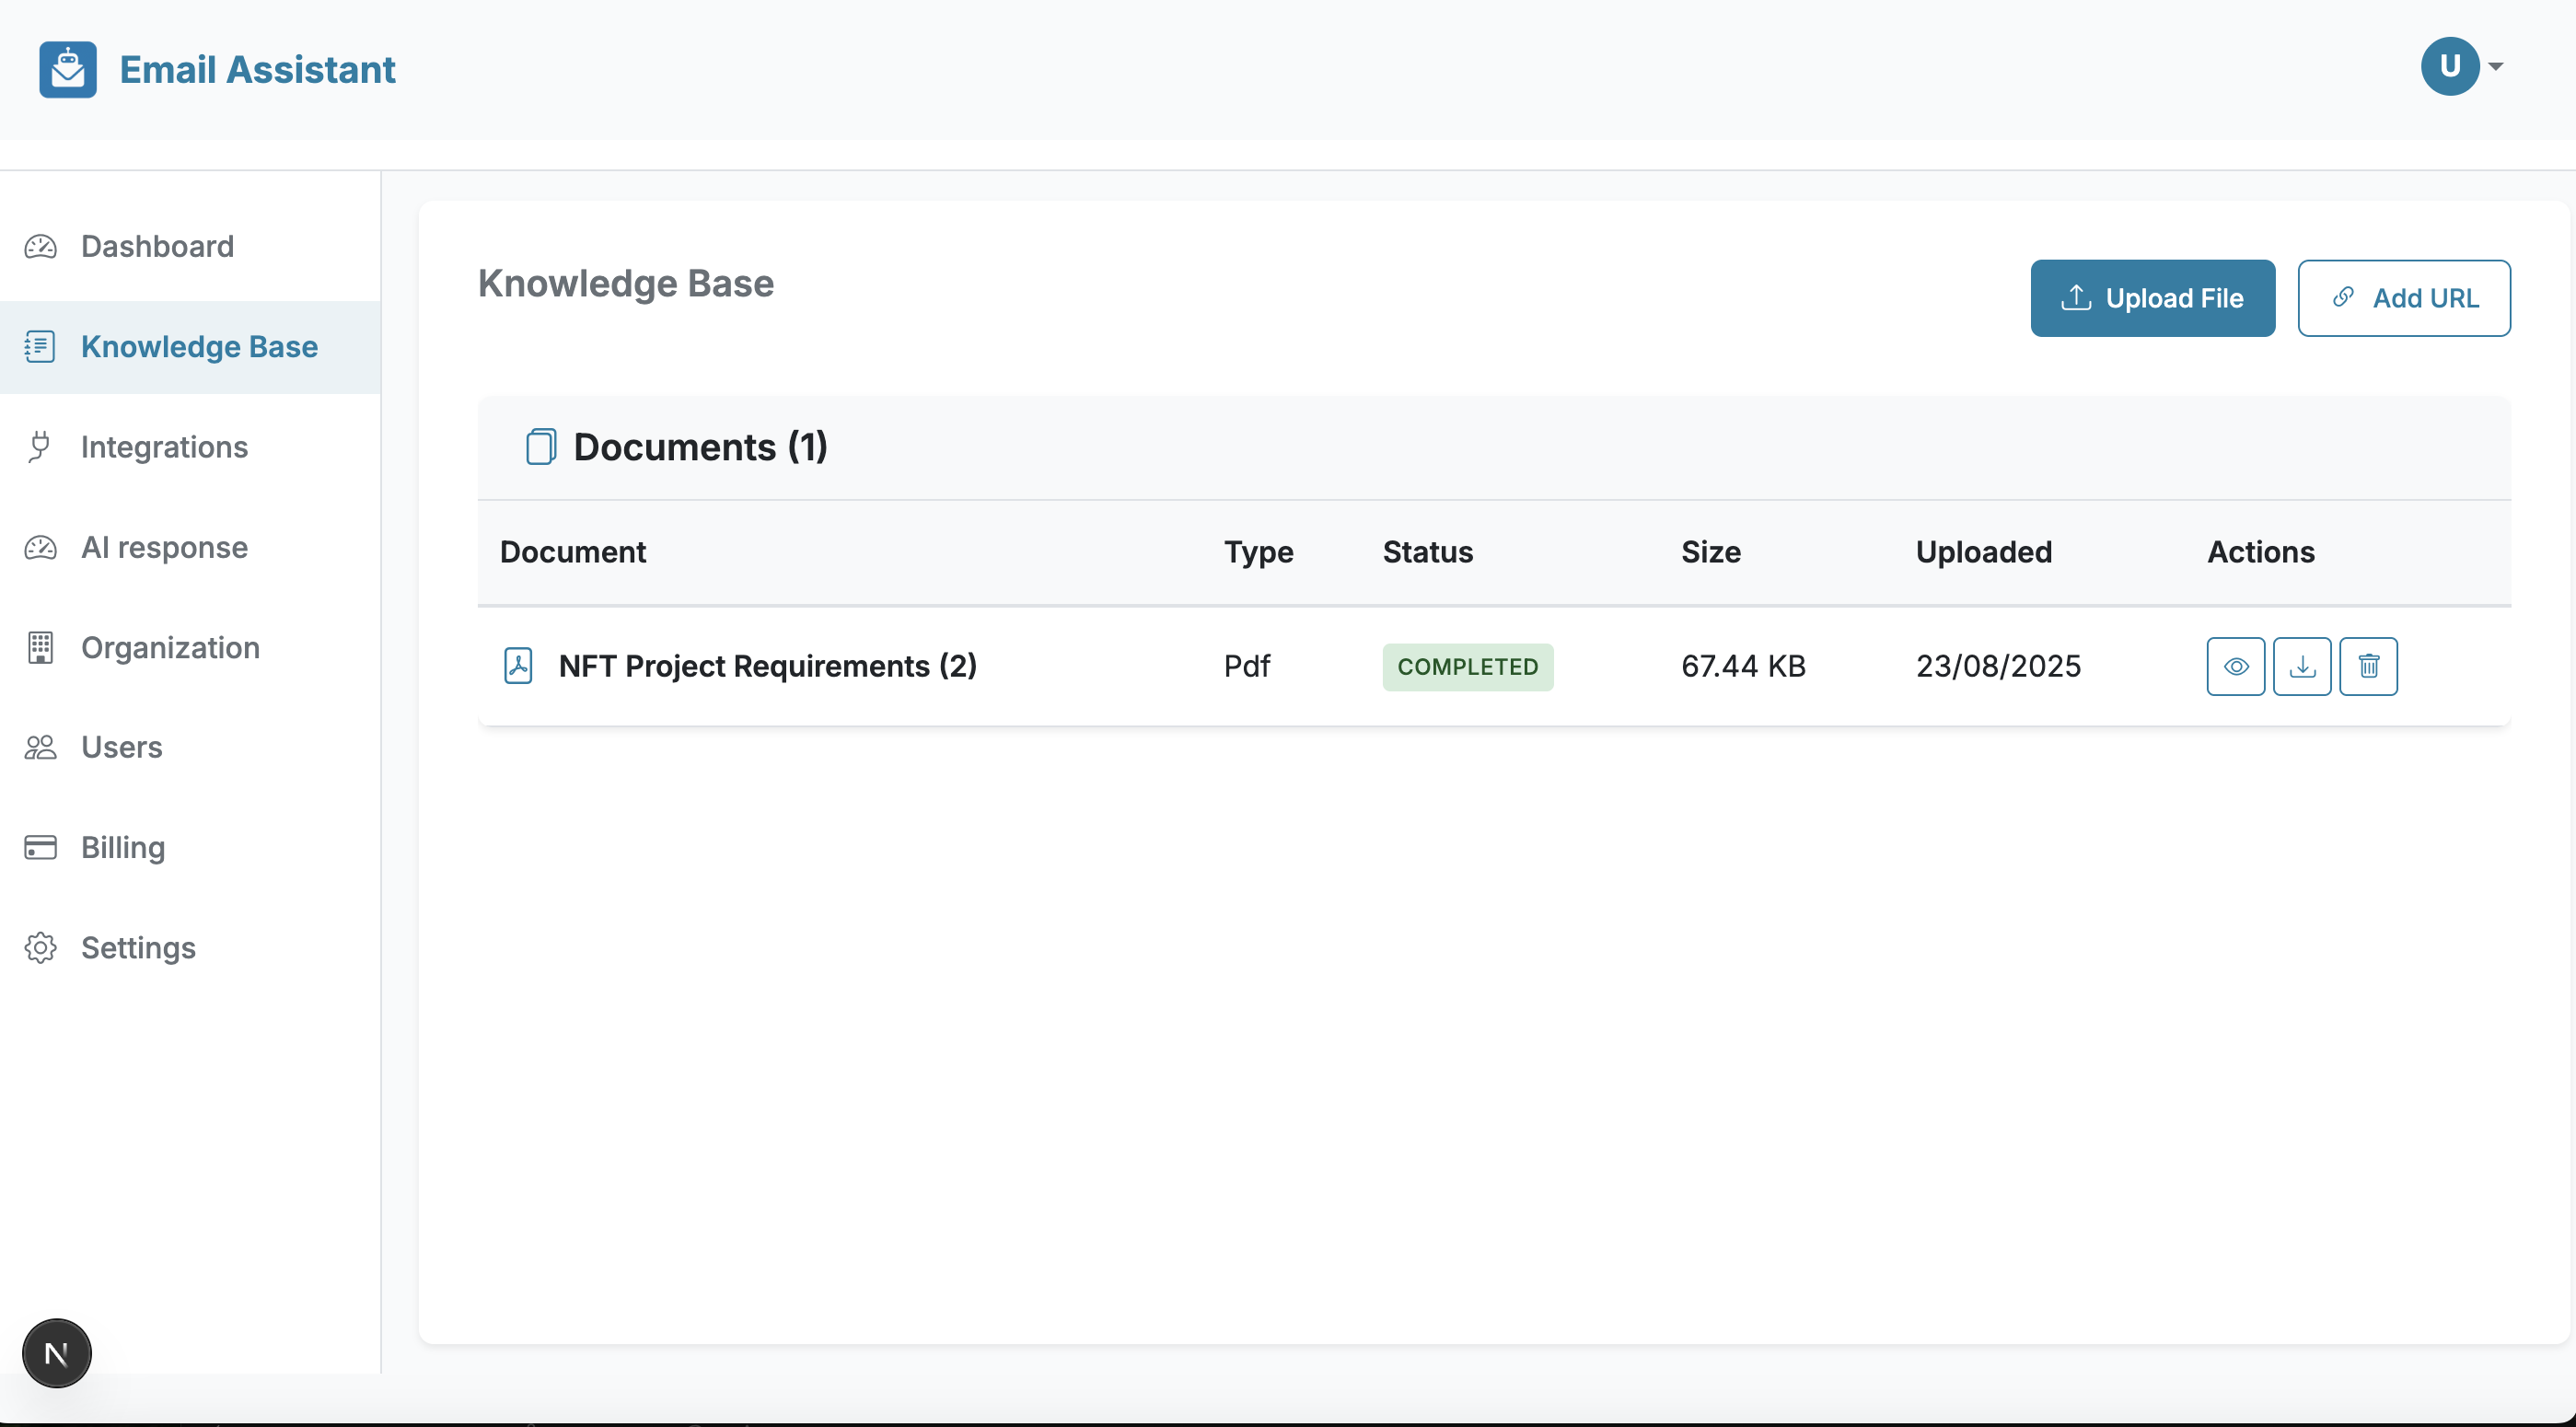
1. Upload Files
- Navigate to the Knowledge Base section from the Dashboard
- Click the "Upload File" button
- Select the document you want to add (supports various formats like PDF, DOCX, TXT, etc.)
- The document will be processed and added to your Knowledge Base
- The AI will now be able to reference this content when generating responses
2. Add URL
- Navigate to the Knowledge Base section from the Dashboard
- Click the "Add URL" button
- Enter the URL of the webpage or document you want to add
- The content from that URL will be crawled and added to your Knowledge Base
- The AI will use this content as context for future email responses
Tips:
- Add frequently asked questions (FAQs) documents
- Include product documentation and manuals
- Add company policies and procedures
- Include any reference materials that help answer customer inquiries
- Regularly update your Knowledge Base with new information
Knowledge Base (Auto sync)
Automatically sync content from existing systems and tools
Note: As of the time of writing this documentation, the Integrations feature is still being developed. This feature will be available in a future update.
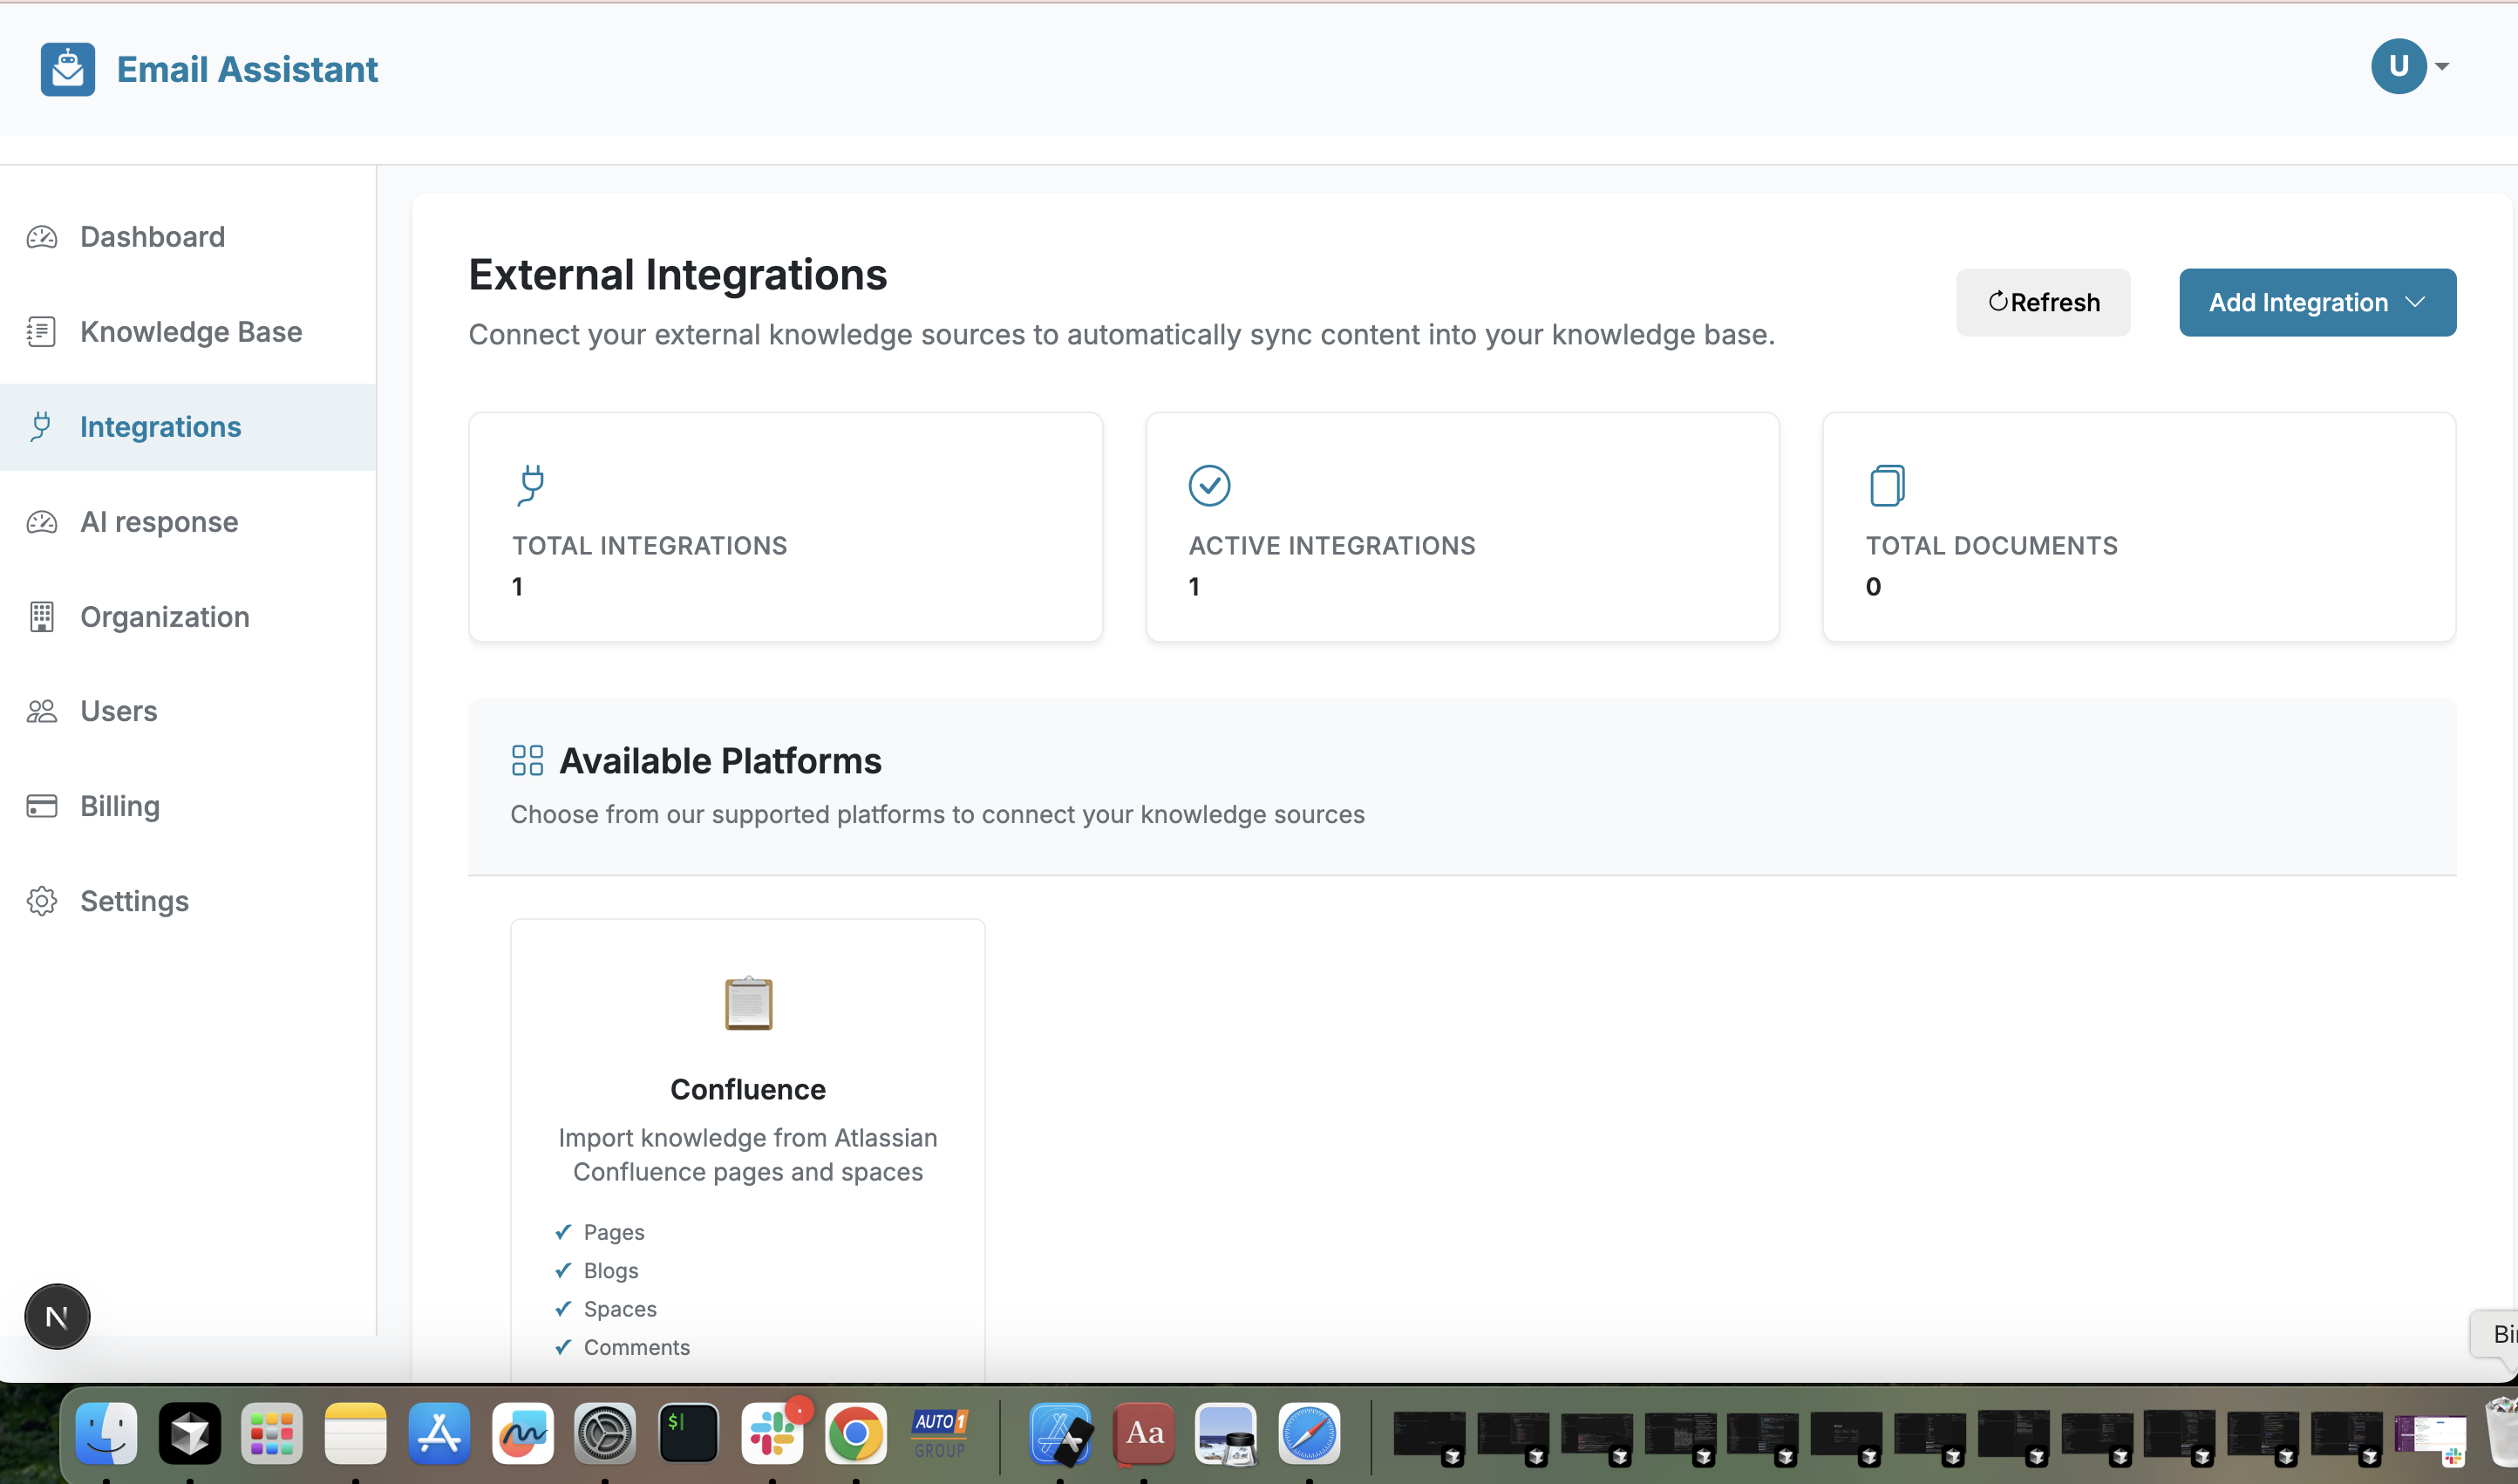
What are Integrations?
Integrations allow you to automatically sync content from external tools and platforms directly into your Knowledge Base. Instead of manually uploading files or adding URLs, integrations automatically sync data from connected services, keeping your Knowledge Base up-to-date without manual intervention.
Integration Support
Planned integration support includes:
- Confluence: Sync documentation and knowledge base content
- Google Sheets: Automatically pull data and content from spreadsheets
- Excel/Office 365: Sync documents and data from Microsoft Office
- Wiki: Connect to internal wikis and documentation platforms
- Other Tools: Additional integrations will be added over time
Advantages
The main advantage of integrations is that they do not require manual upload but automatically sync with places where you already have company data stored. This ensures your Knowledge Base stays current as source documents are updated, eliminating the need for repetitive manual uploads.
AI Response Settings
Configure how your AI should sound and respond
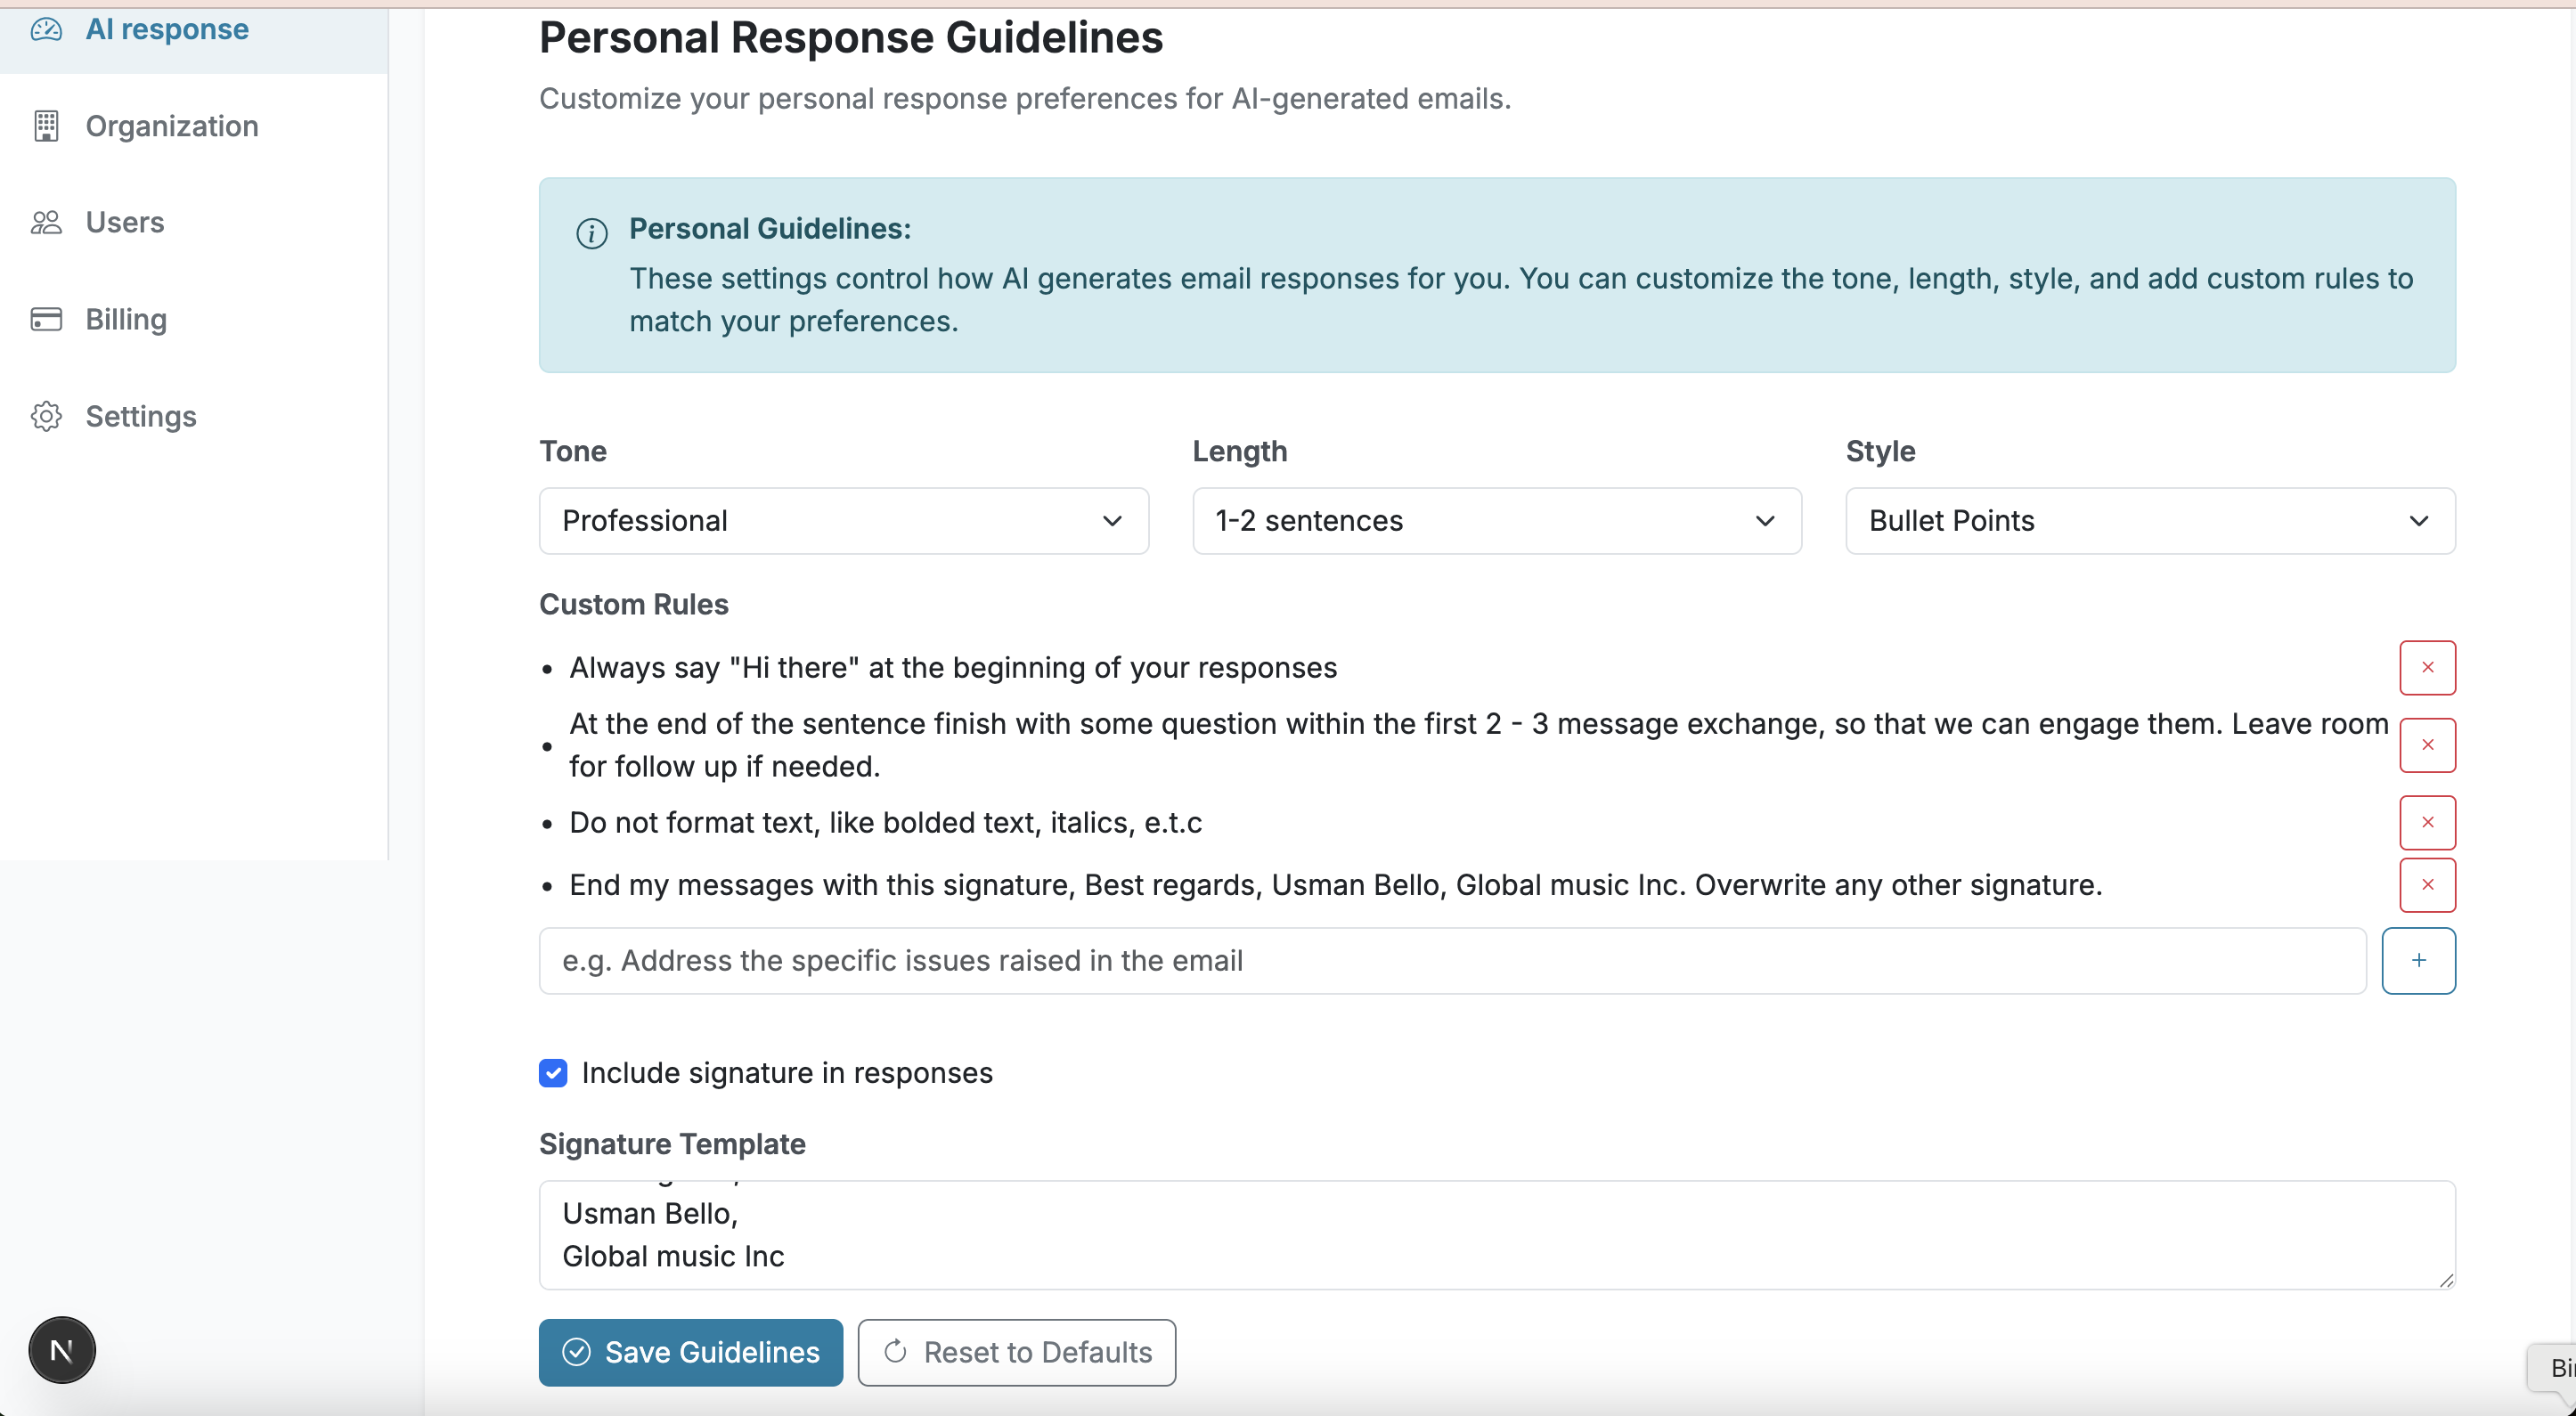
What are AI Response Settings?
The AI Response Settings allow you to customize how the AI generates email responses. This section provides guidelines and configuration options that control the tone, style, personality, and behavior of AI-generated replies.
Configuration Options
In the AI Response Settings, you can configure:
- Tone: Set the communication tone (professional, friendly, casual, formal, etc.)
- Style: Define the writing style and personality
- Guidelines: Add specific instructions on how the AI should respond
- Response Length: Control the length and detail level of responses
- Custom Instructions: Add specific rules or preferences for response generation
How to Configure
- Navigate to "AI Response Settings" from the Dashboard
- Review the available configuration options
- Set your preferred tone and style
- Add any custom guidelines or instructions
- Save your settings
- The AI will now use these guidelines when generating email responses
Example Guidelines:
- "Always be professional and courteous"
- "Keep responses concise and to the point"
- "Use technical terminology when appropriate"
- "Always include a call to action"
Organization
Manage your organization details and settings
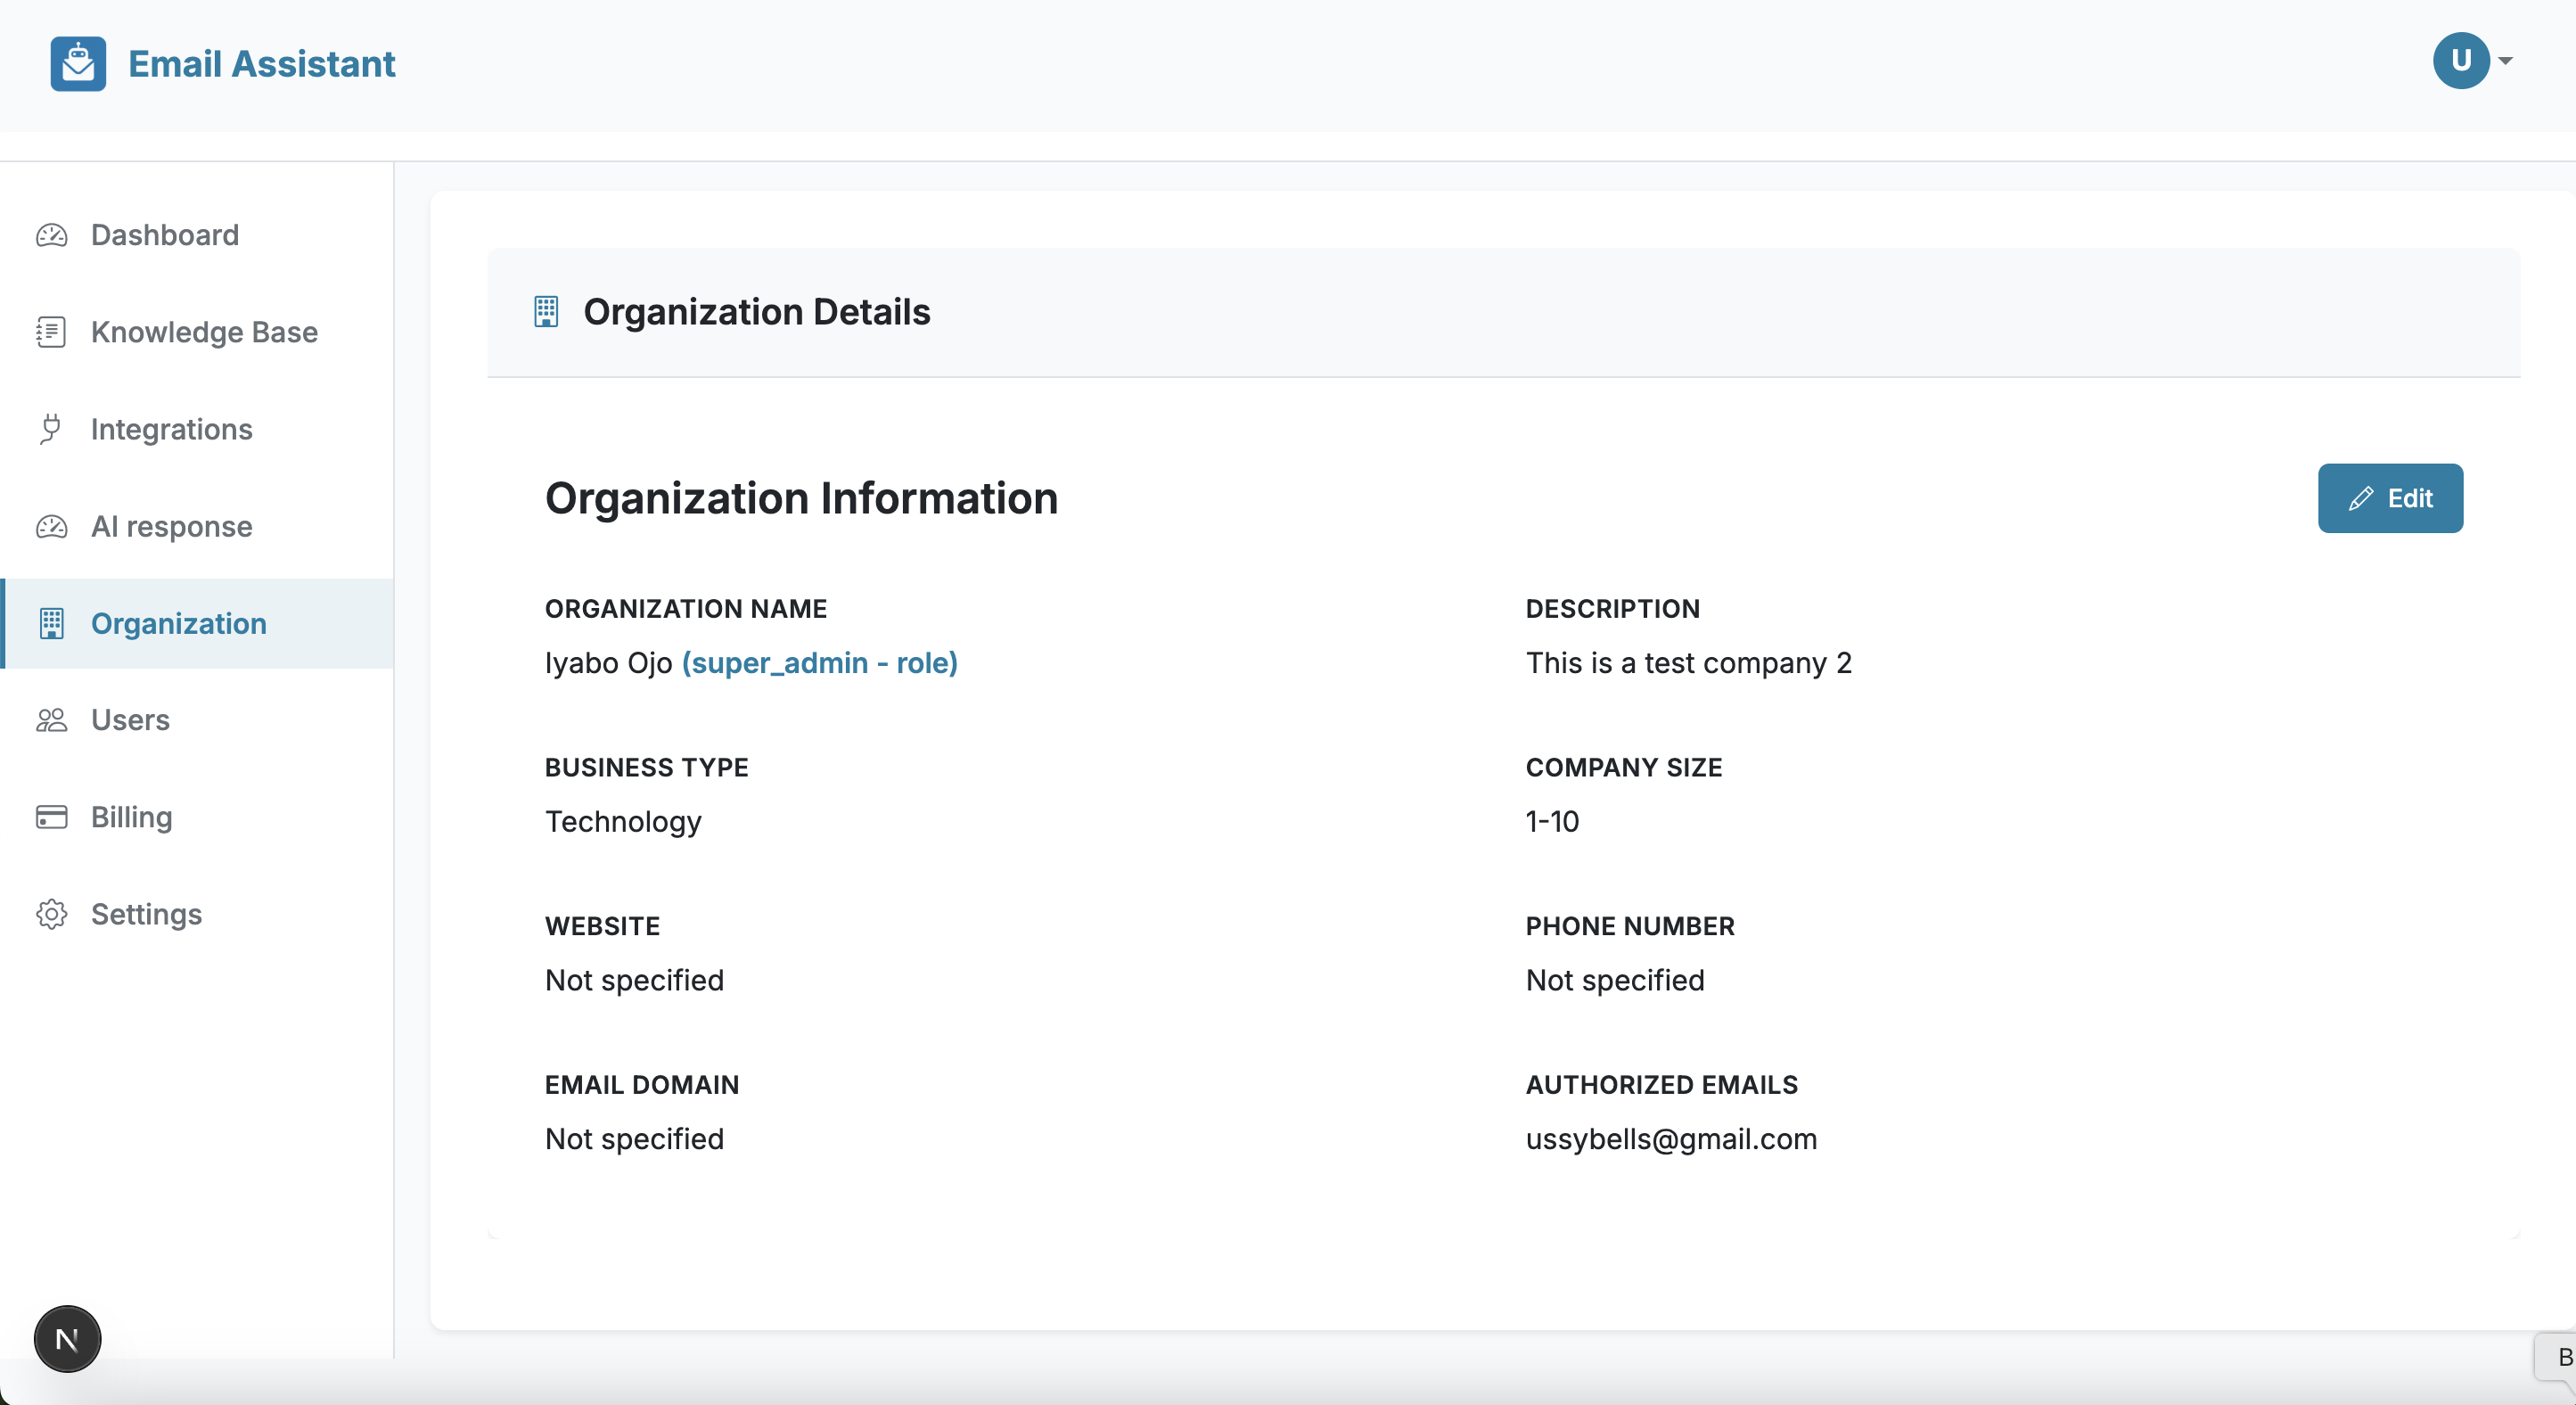
What is the Organization Section?
The Organization section is available for organization-type accounts. Here, you can view and edit your organization's details, settings, and configuration.
Available Features
In the Organization section, you can:
- View Organization Details
- Edit Organization Information
- Manage Organization Settings
- Domain Management
How to Access
- Navigate to "Organization" from the Dashboard (organization accounts only)
- View your current organization details
- Click "Edit" to modify any information
- Save your changes
Note: Individual accounts do not have access to this section. This is only available for organization-type accounts created during registration.
Users
Manage team members and user permissions
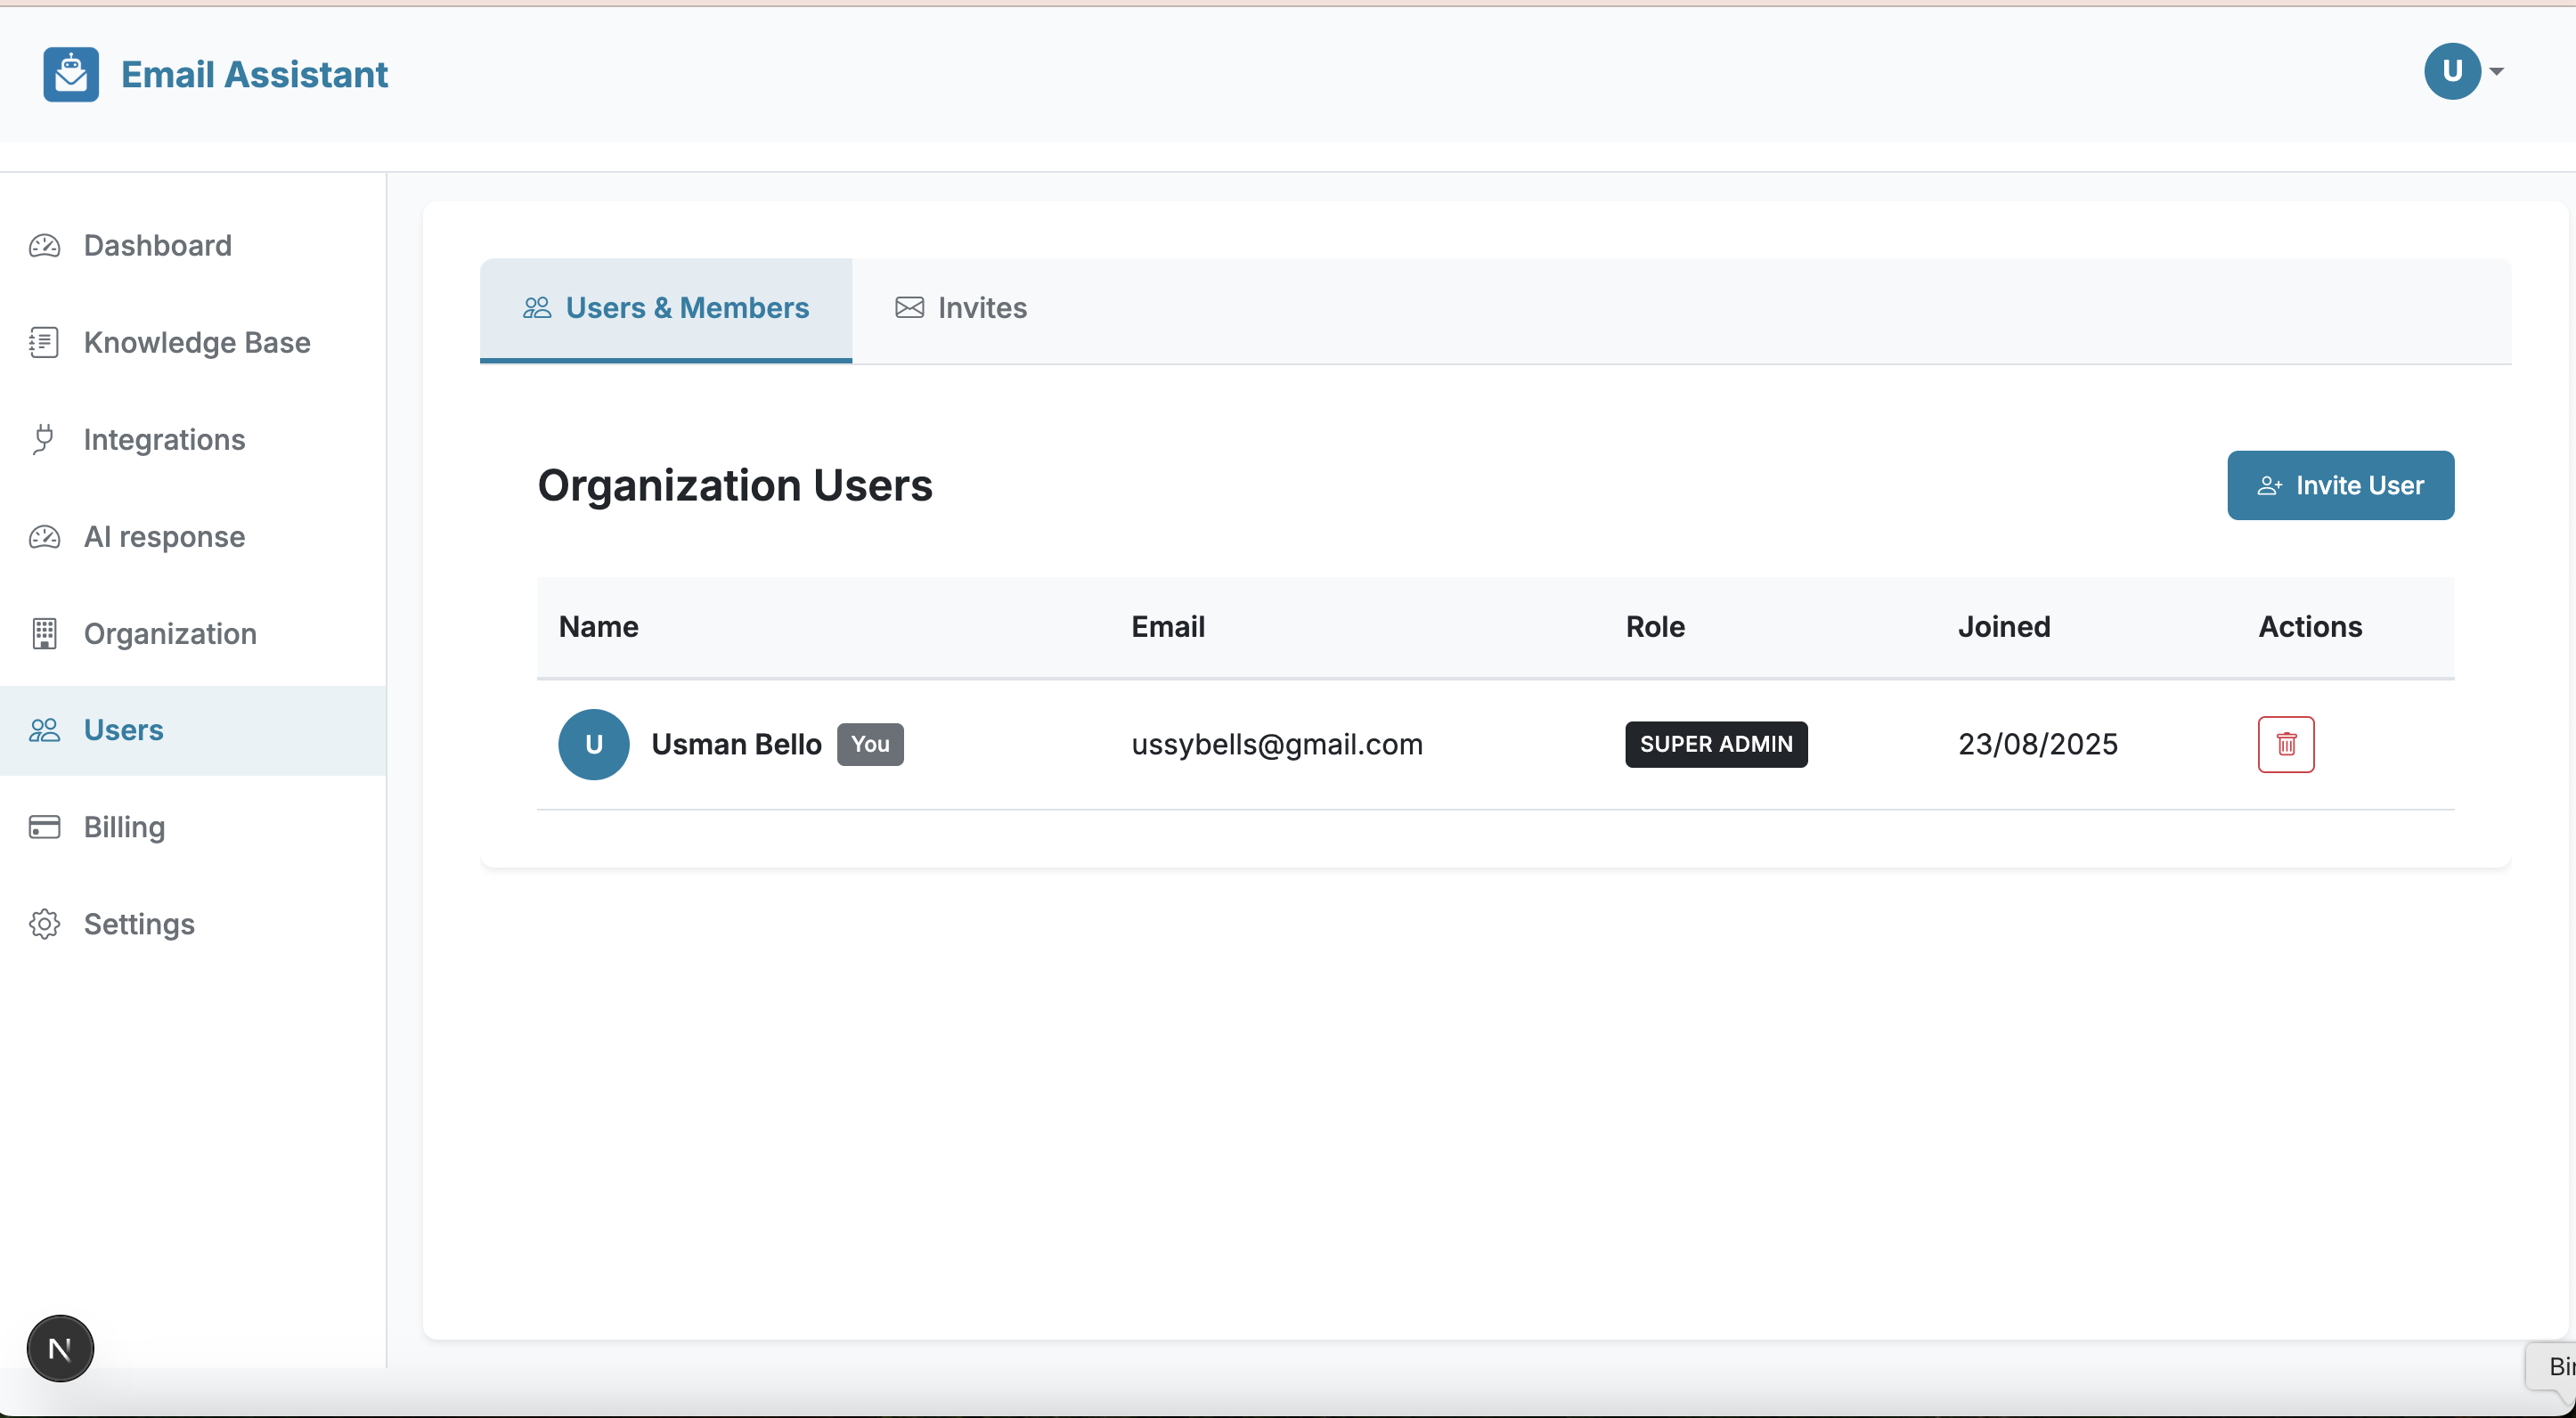
What is the Users Section?
The Users section allows organization administrators to manage team members, view user lists, and control access permissions. This section is only available for organization-type accounts.
Available Features
In the Users section, you can:
- View All Users
- Invite Users
- Manage Permissions
- Remove Users
- View User Activity
How to Manage Users
- Navigate to "Users" from the Dashboard (organization accounts only)
- View the list of current team members
- Click "Invite User" to add new members
- Set permissions and roles for each user
- Manage existing users as needed
Note: Individual accounts do not have access to this section. This is only available for organization-type accounts.
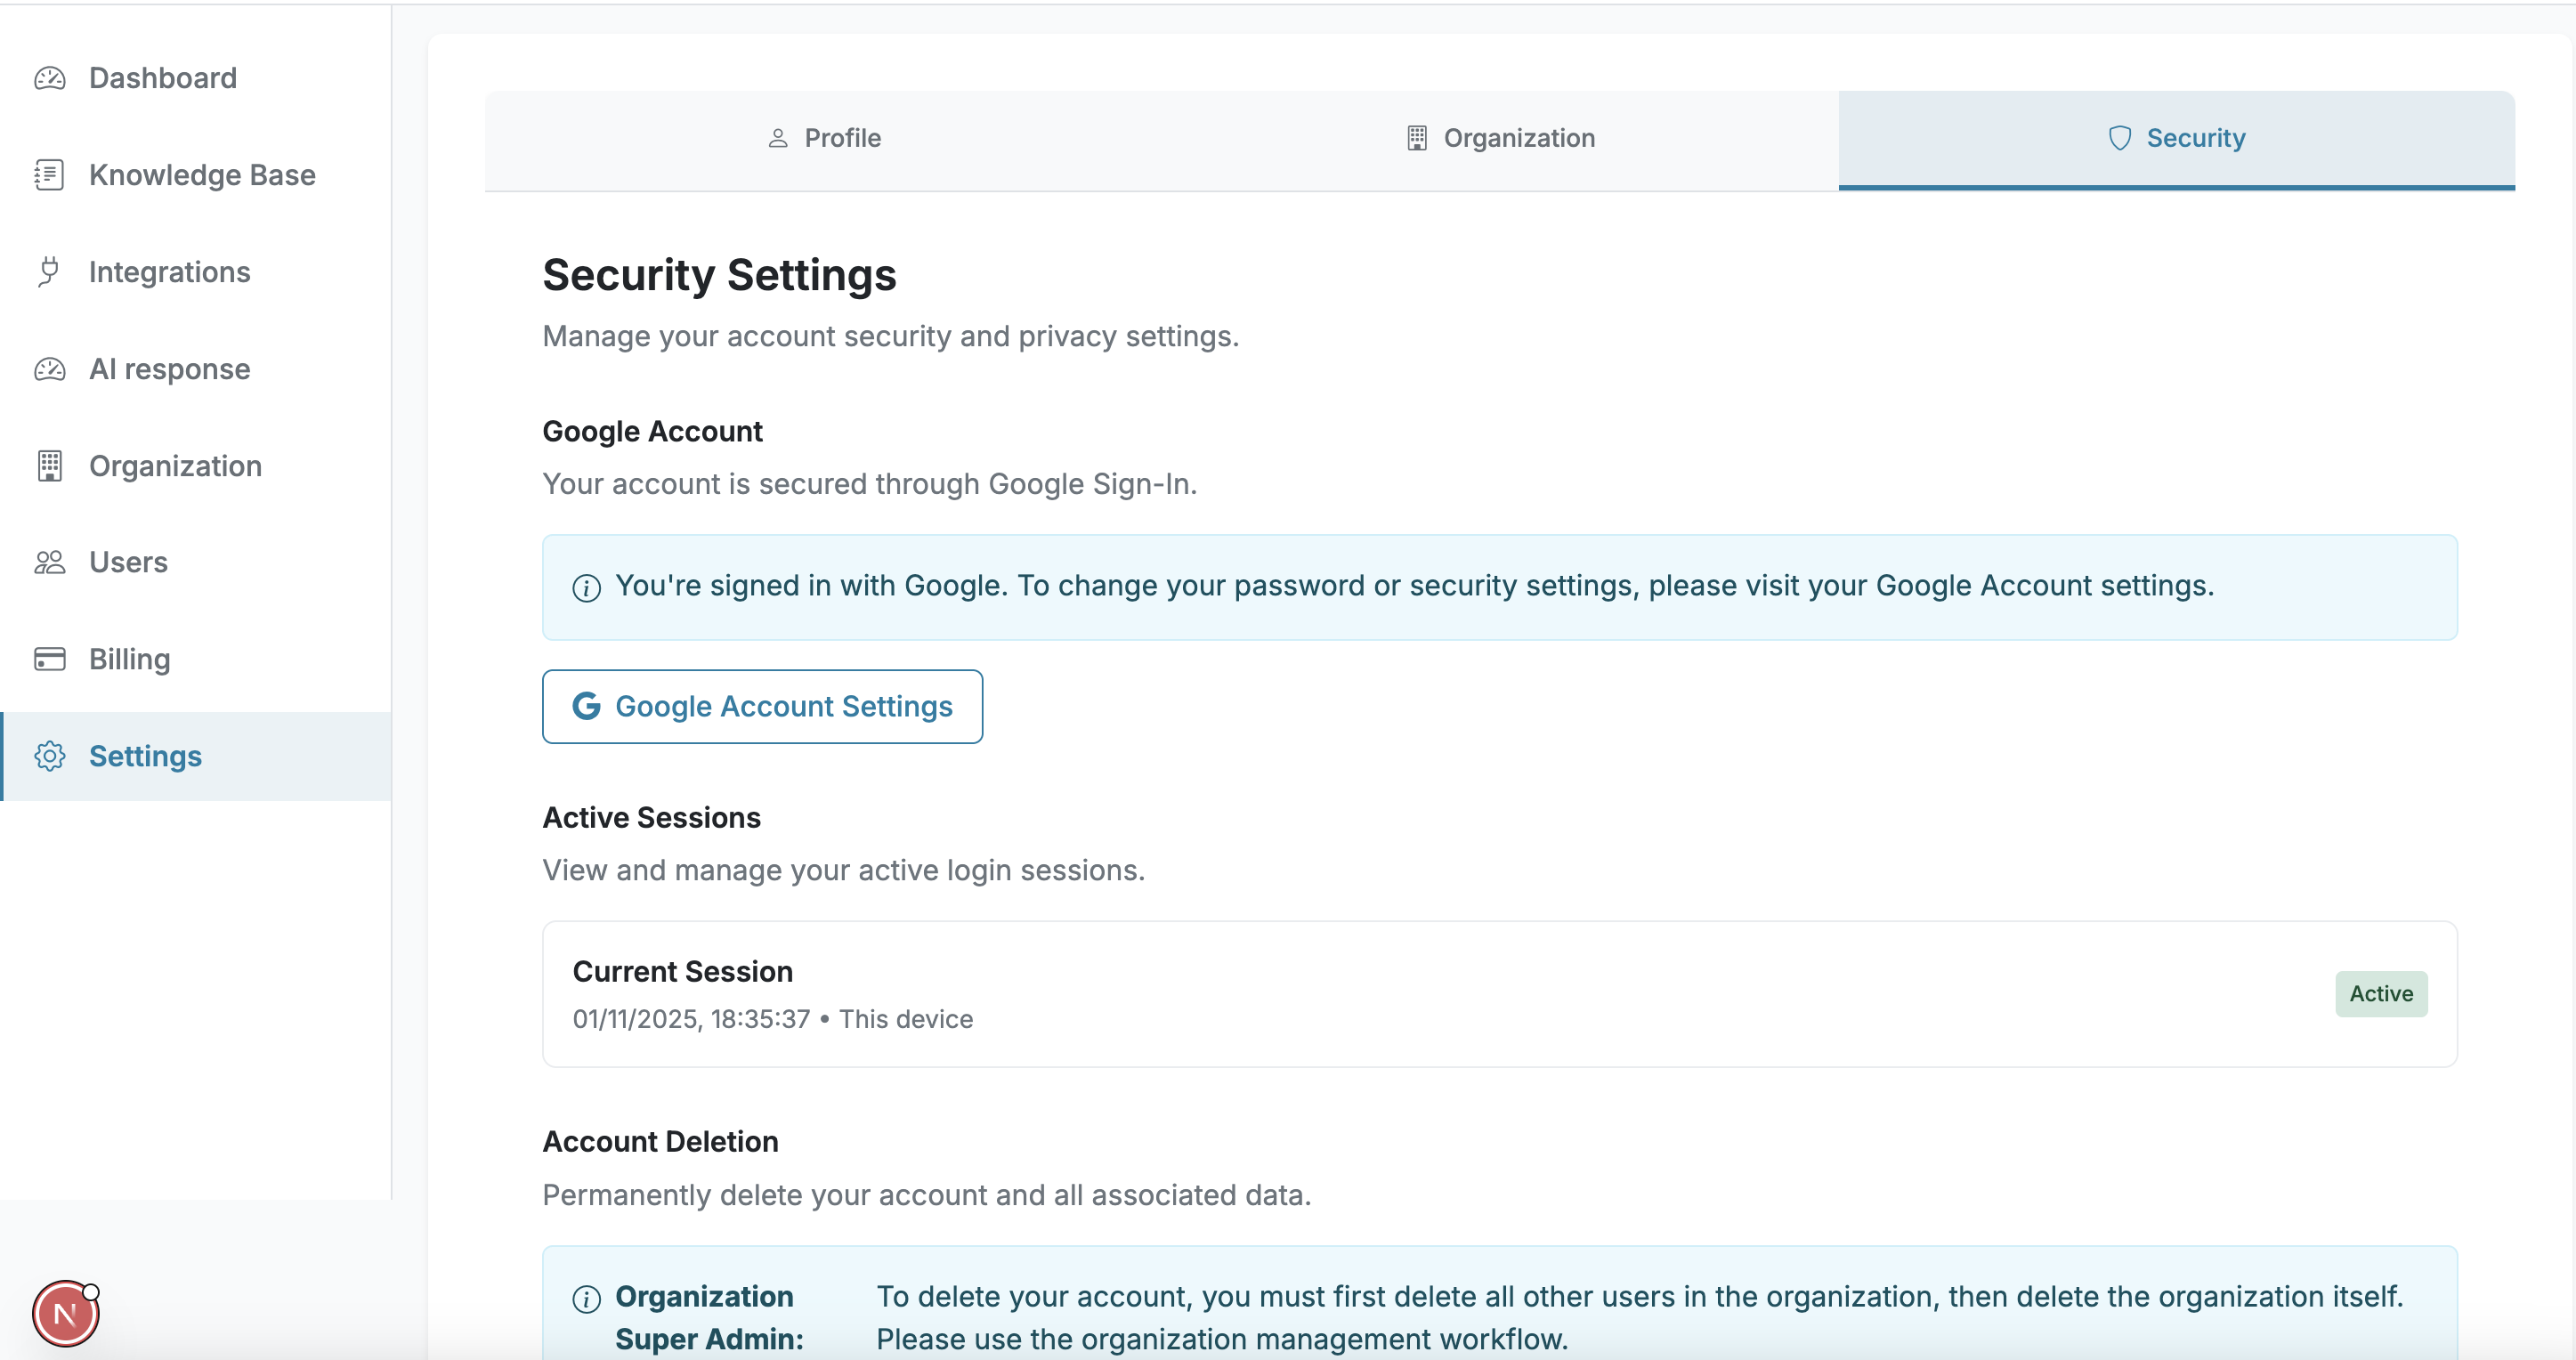
Settings
Configure your personal preferences and account settings
What is the Settings Section?
The Settings section allows you to set your personal preferences and configure your account settings. This is available for both individual and organization accounts.
Available Settings
- Profile Settings
- Organization Settings
- Security Settings
How to Configure
- Navigate to "Settings" from the Dashboard
- Browse through the available settings categories
- Modify any preferences you want to change
- Save your settings
- Your preferences will be applied immediately
Gmail Add-on Installation & Usage
Install and use the Email Assistant Gmail Add-on to generate AI-powered email responses
Important: Before installing the Gmail Add-on, make sure you have:
- Registered an account in the Email Assistant back office
- Added context and documentation to your Knowledge Base in the back office
- Configured your AI Response Settings
The AI needs context from your Knowledge Base to generate accurate and relevant email responses.
Test Installation (Google Apps Script)
Step-by-step guide for installing the Email Assistant add-on via Google Apps Script
Where the Add-on Will Appear
After installation, the Email Assistant add-on will appear in the Gmail sidebar. The sidebar can be toggled using the icon indicated by the arrow in the image below.
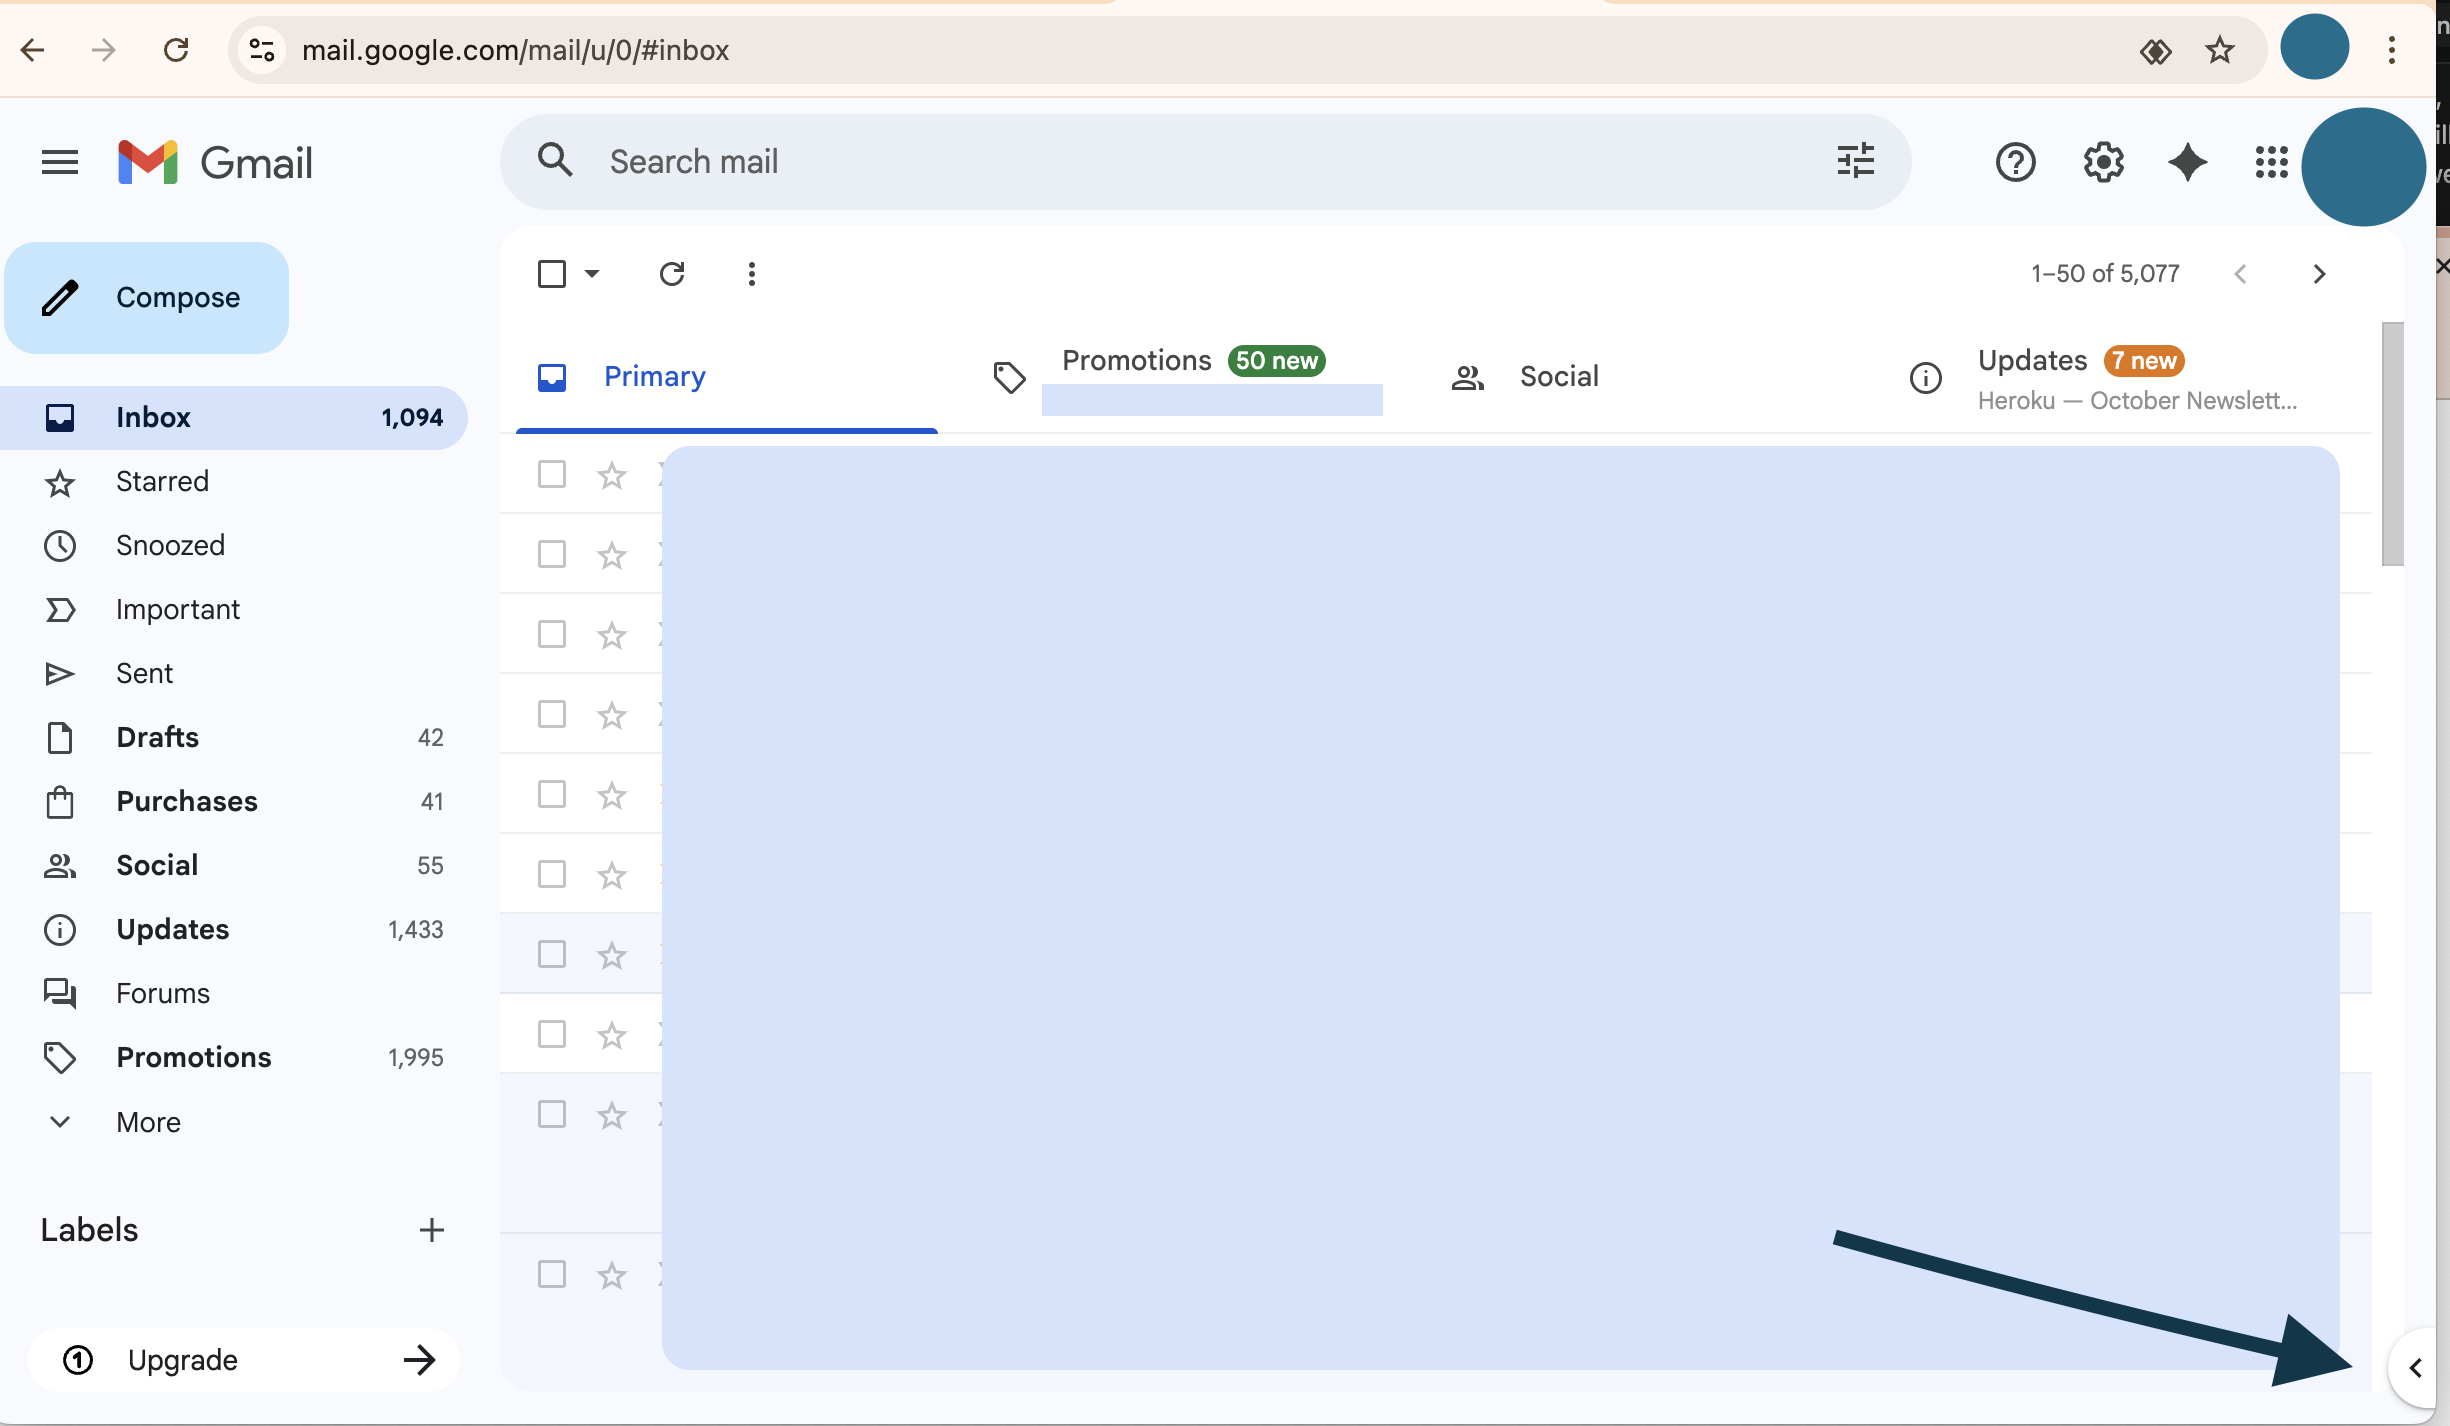
Step 1: Open the Gmail Sidebar
Click on the sidebar toggle (where the arrow points in the image above) to open the Gmail sidebar.

This is where the Email Assistant add-on will appear after installation. Without the addon installed, the sidebar will be empty as shown above.
Step 2: Open the Google Apps Script
Click the link below to open the Google Apps Script project. This will take you directly to the installation interface.
Open Google Apps Script Project →
Note: Make sure you're using the same Gmail account that's registered in the back office for testing.
Step 3: Click the Deploy Button
When you open the Google Apps Script link, you will see the interface as shown below. Click the blue "Deploy" button indicated by the arrow.

Step 4: Select Test Deployment
After clicking "Deploy", a dropdown menu will appear. Select "Test deployments" from the dropdown options.
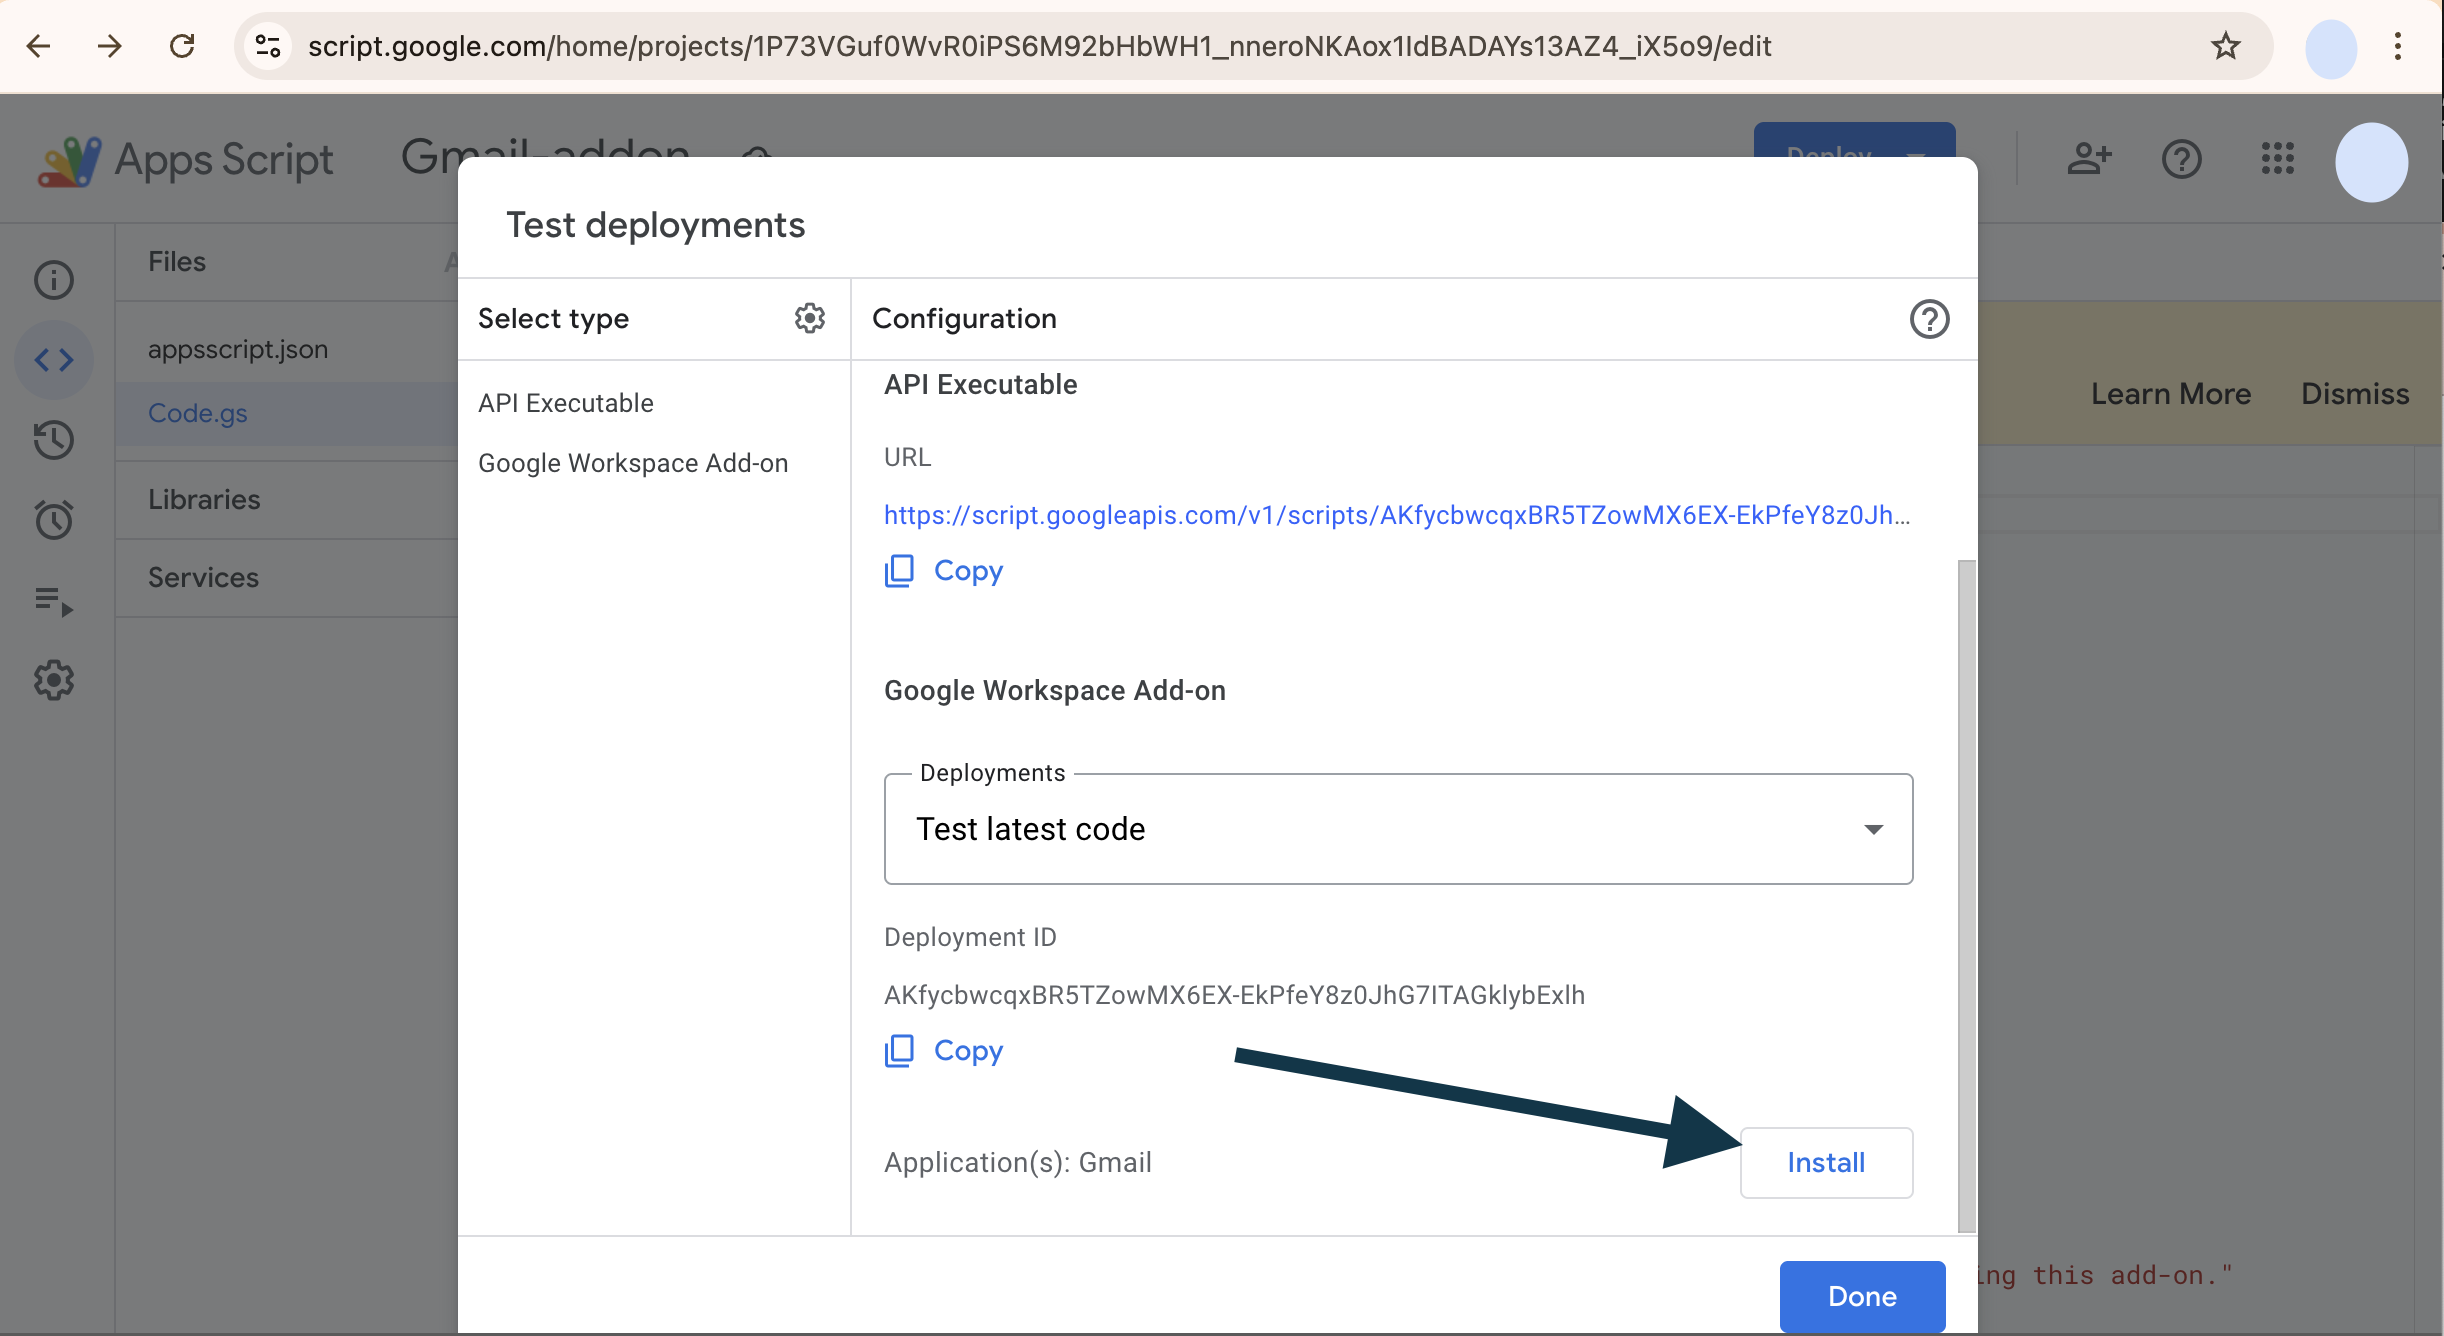
Step 5: Install the Add-on
A popup will appear as shown in the image below. Click the "Install" button indicated by the arrow.
Step 6: Verify Installation
The previous step installs the add-on to your Gmail. Now go to the Gmail URL and refresh the page. You should see the Email Assistant add-on in the sidebar as shown below.
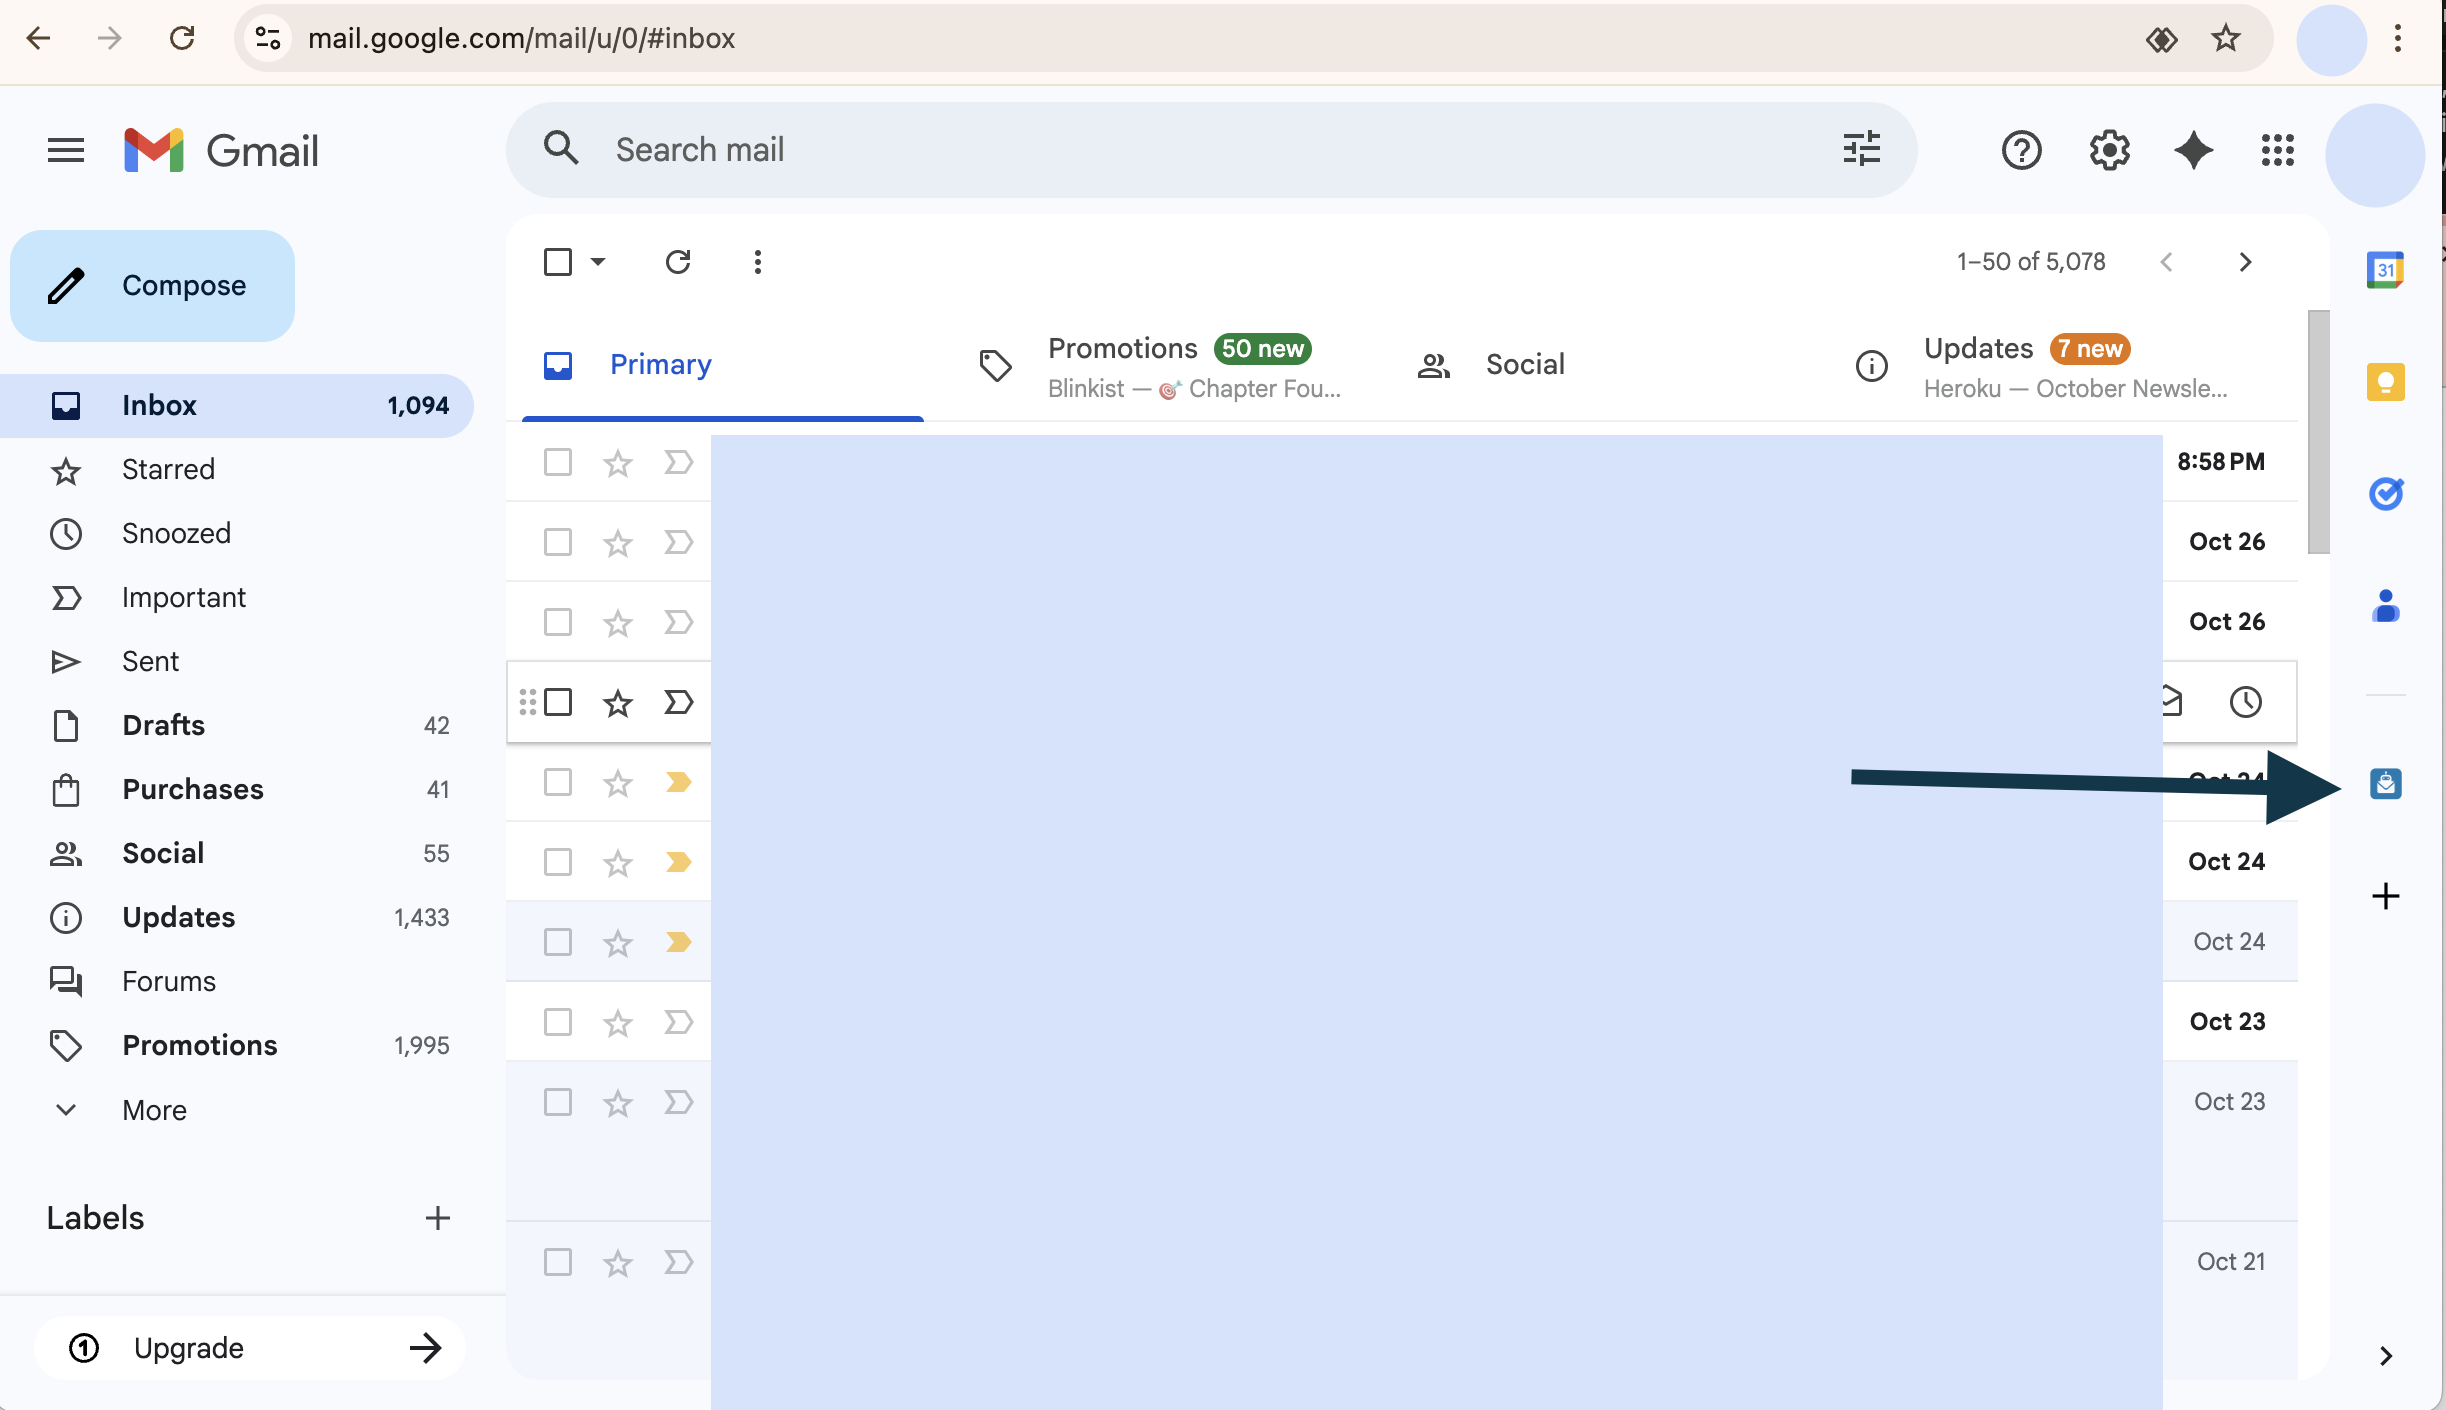
Congratulations! The Email Assistant add-on is now installed and ready to use.
Production Installation (Google Workspace Marketplace)
Installation via Google Workspace Marketplace
Note: Production installation via Google Workspace Marketplace is currently in progress. We are currently in the testing phase using the Test Installation method described above.
Once the add-on is available in the Google Workspace Marketplace, installation will be as simple as searching for "Email Assistant" and clicking "Install". Detailed instructions will be provided once the production version is released.
How to Use the Add-on
Step-by-step guide to generating AI-powered email responses
Step 1: Open the Add-on
Click on the Email Assistant add-on in the Gmail sidebar (as shown in the installation verification step). The add-on will open up as shown below.
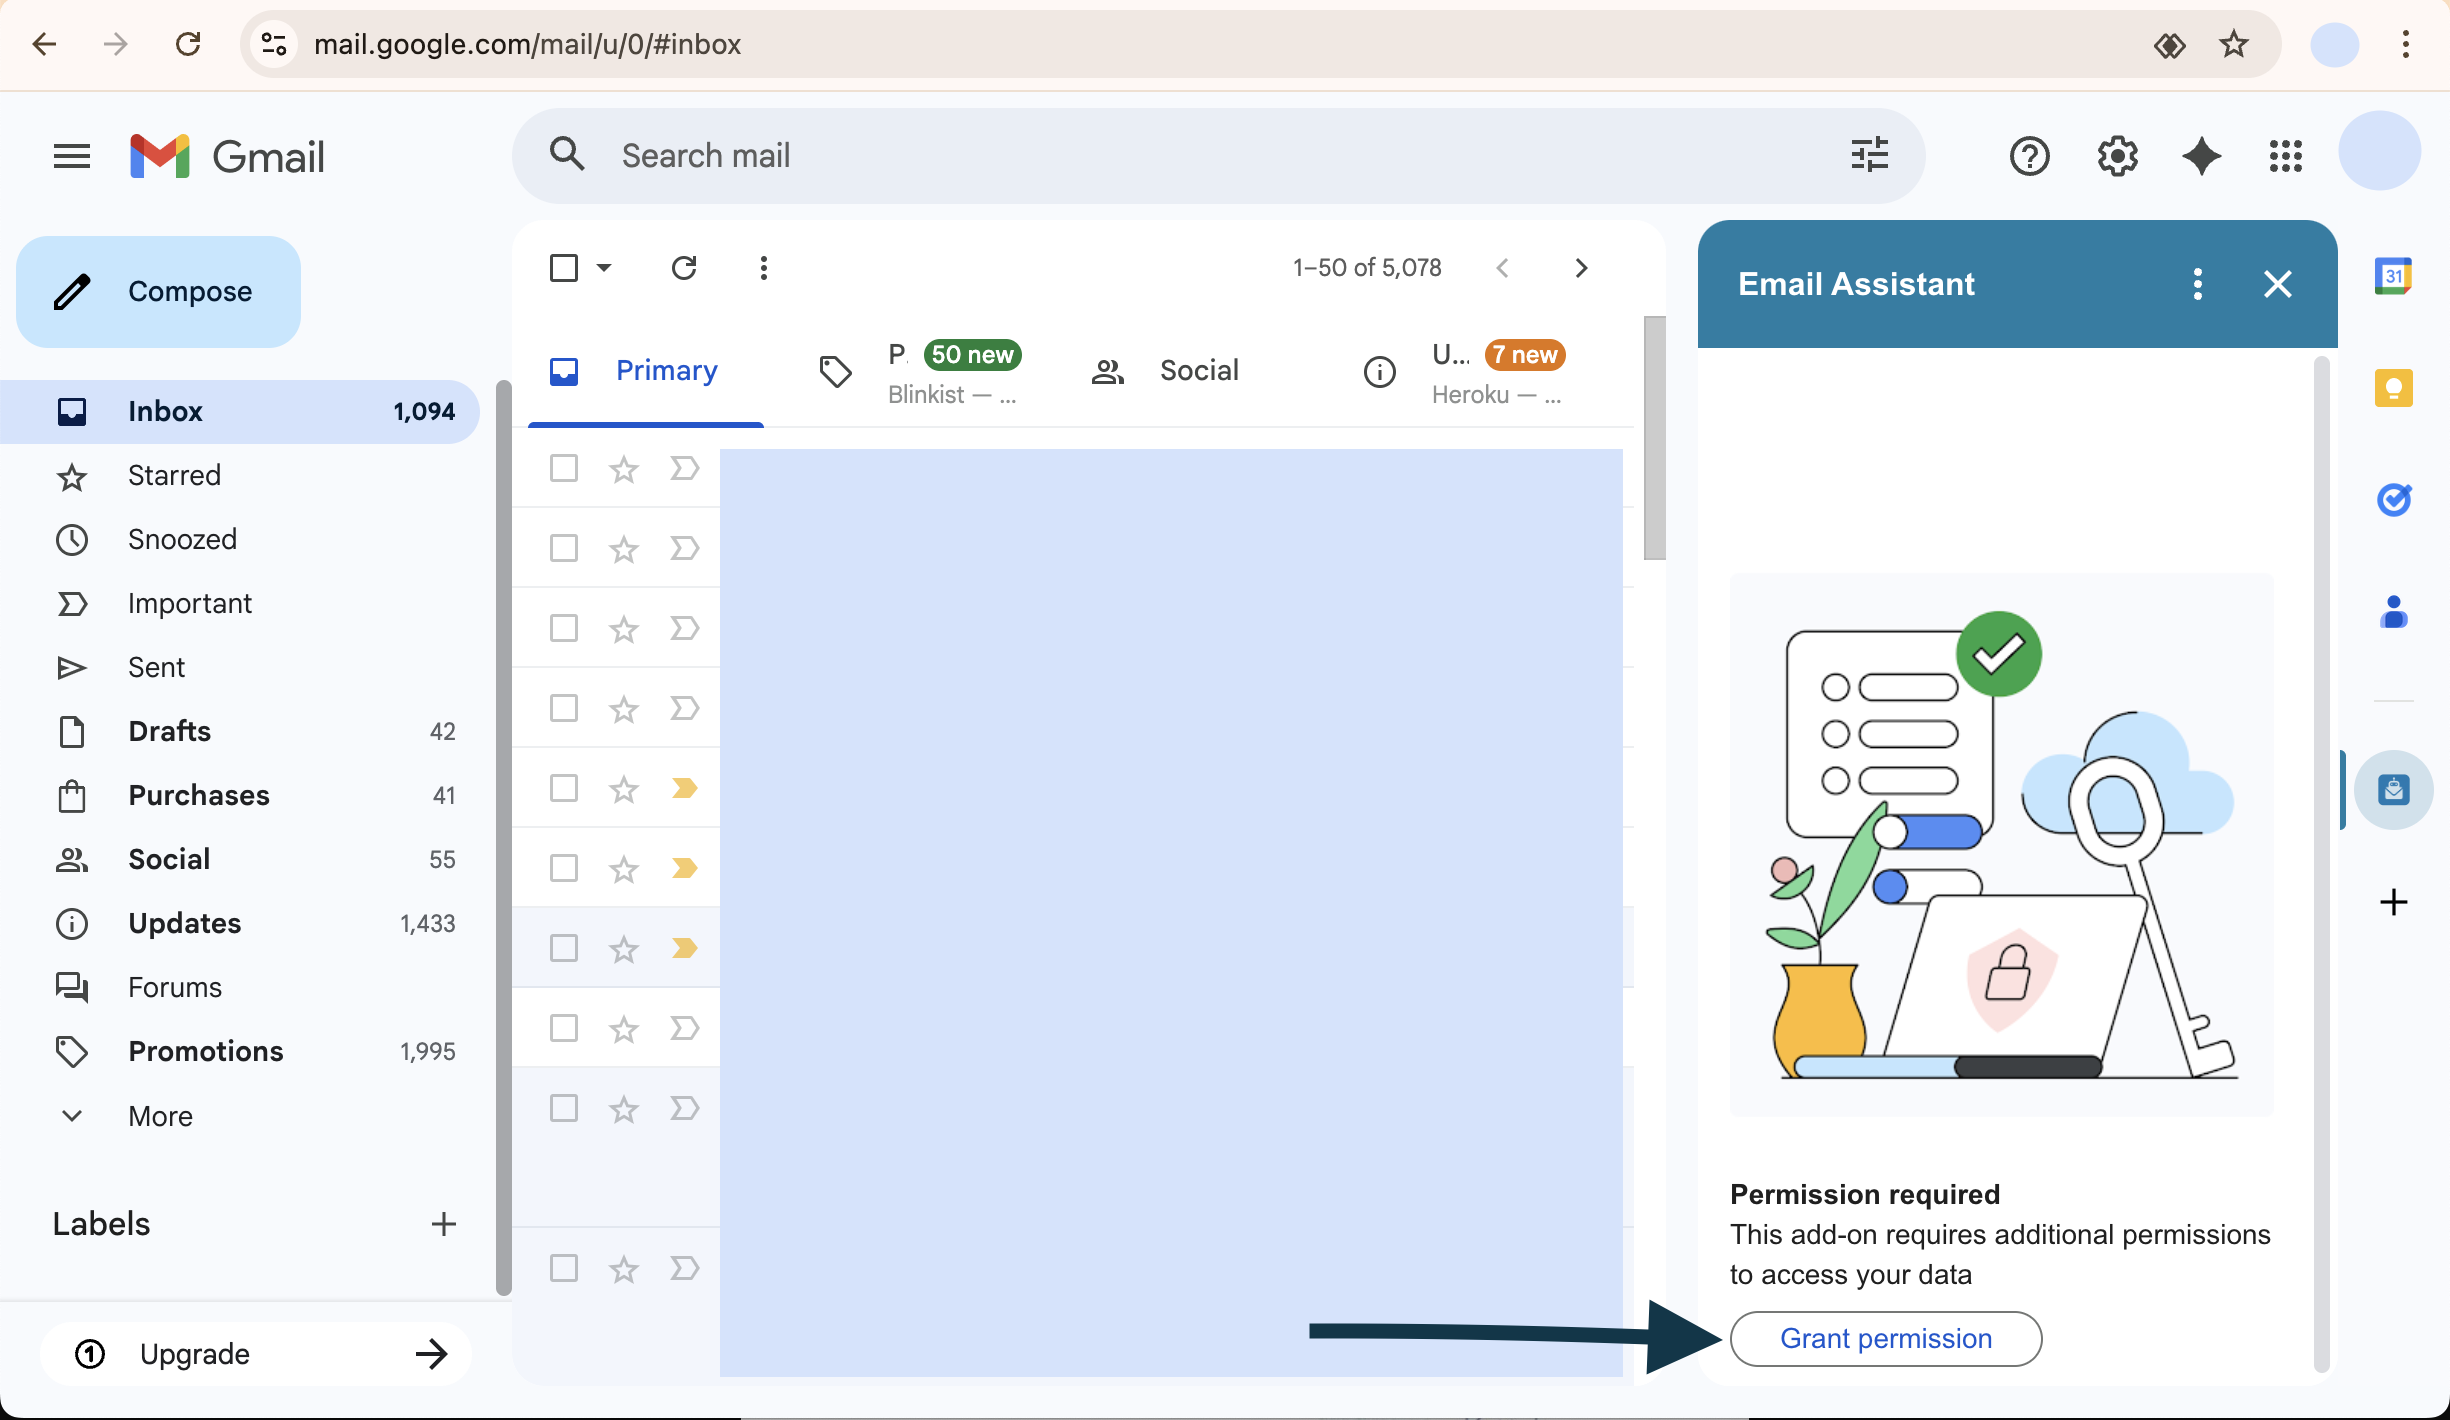
Step 2: Grant Permissions
Click the "Grant Permissions" button indicated by the arrow in the image above. This allows the add-on to access your Gmail and generate responses.
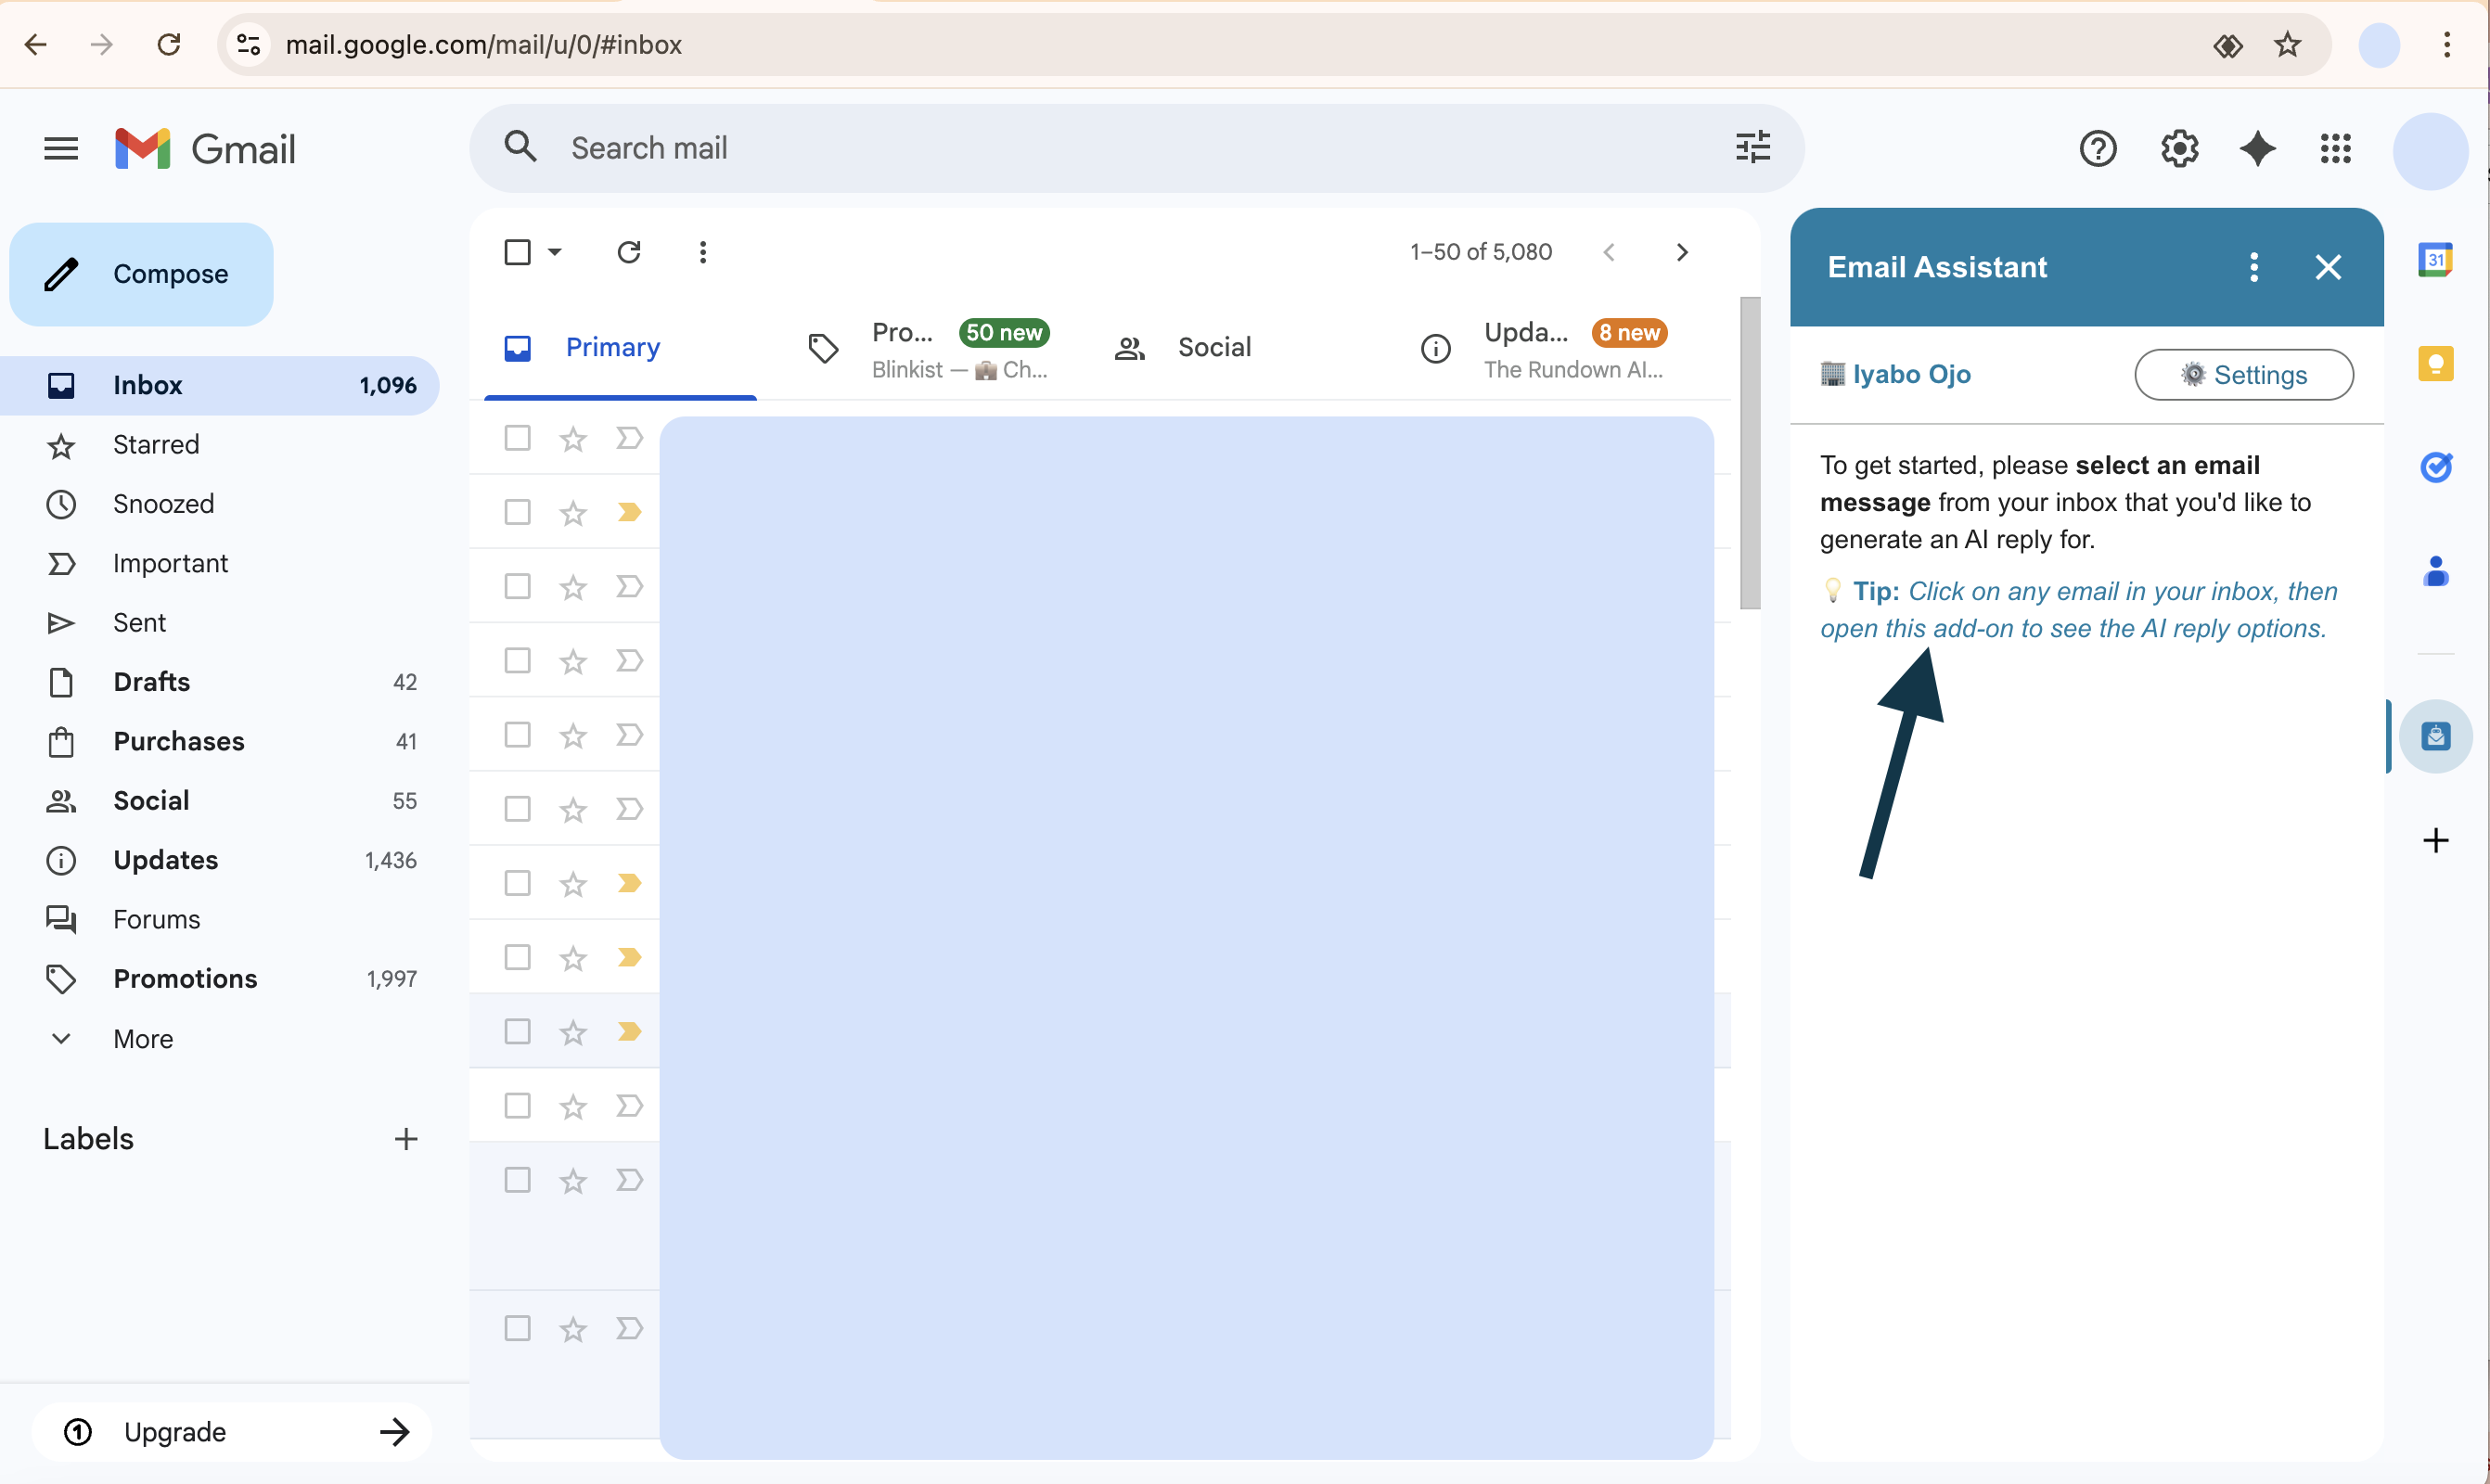
Step 3: Select an Email
After granting permissions, you will see a guide view as shown below. This view instructs you to click on the email you want to respond to.
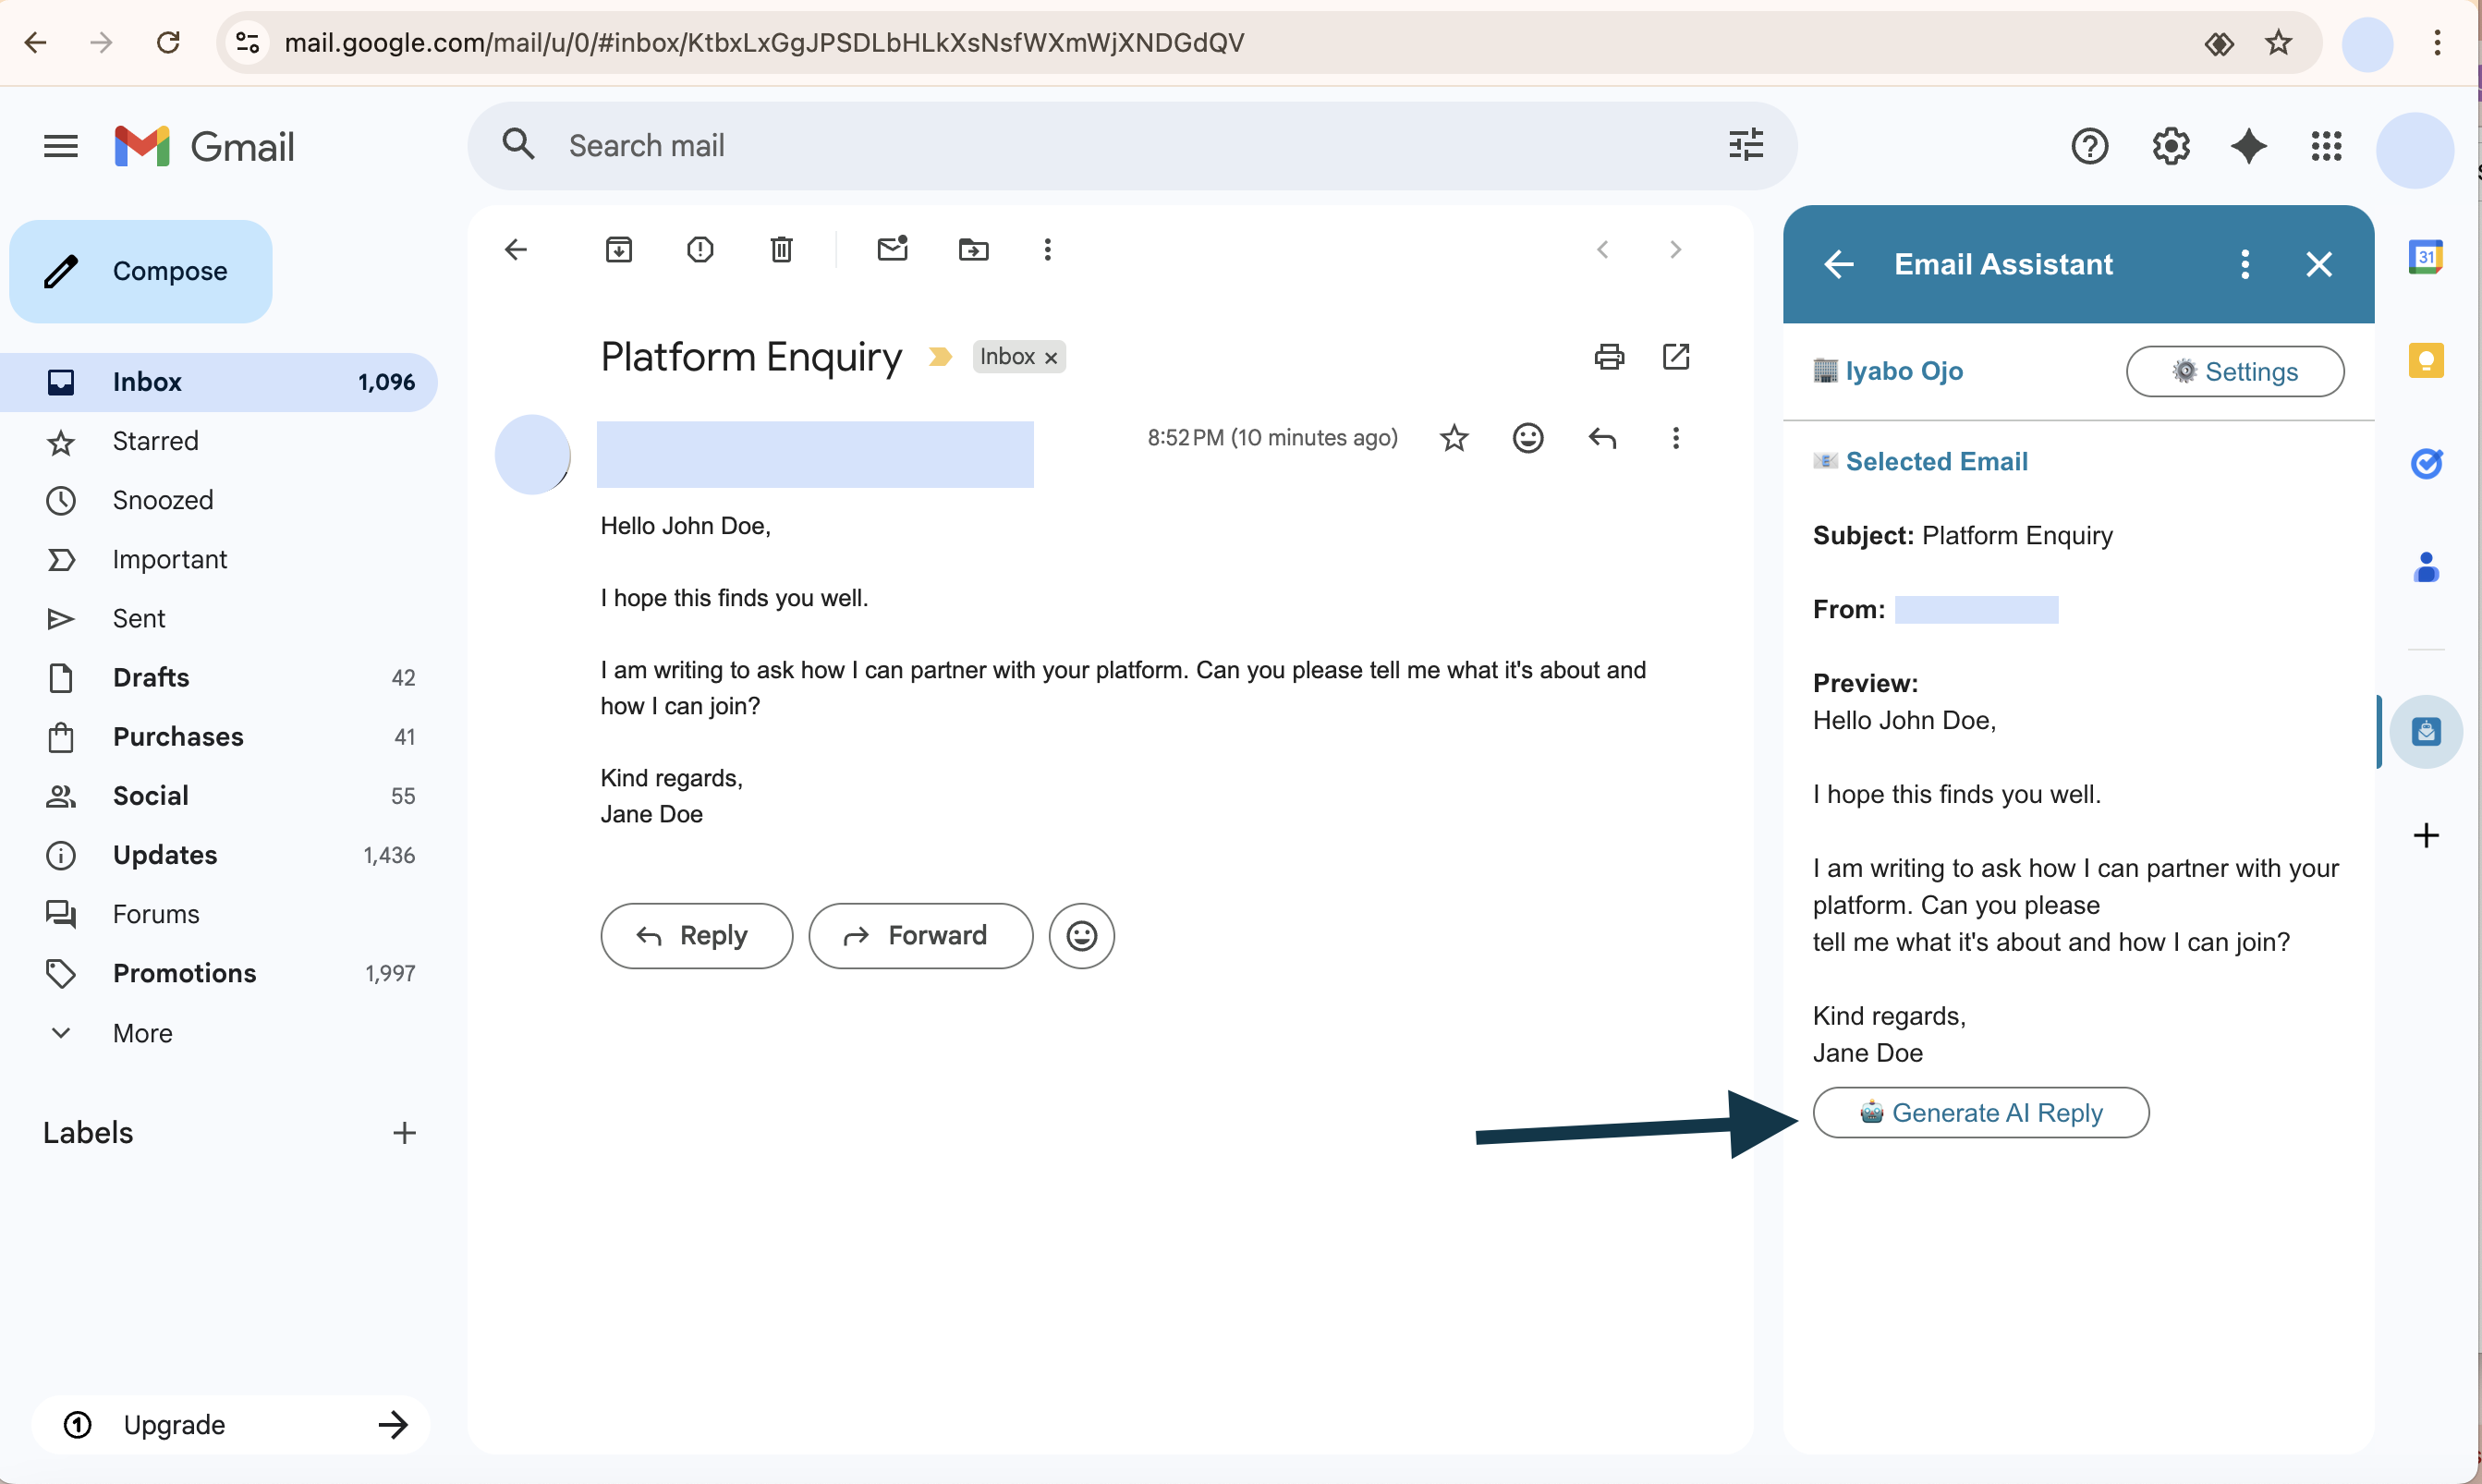
Step 4: View Email Preview and Generate Reply
Once you select an email, it will be shown as a preview in the add-on as shown below. Click the "Generate A reply" button to generate AI-powered responses.
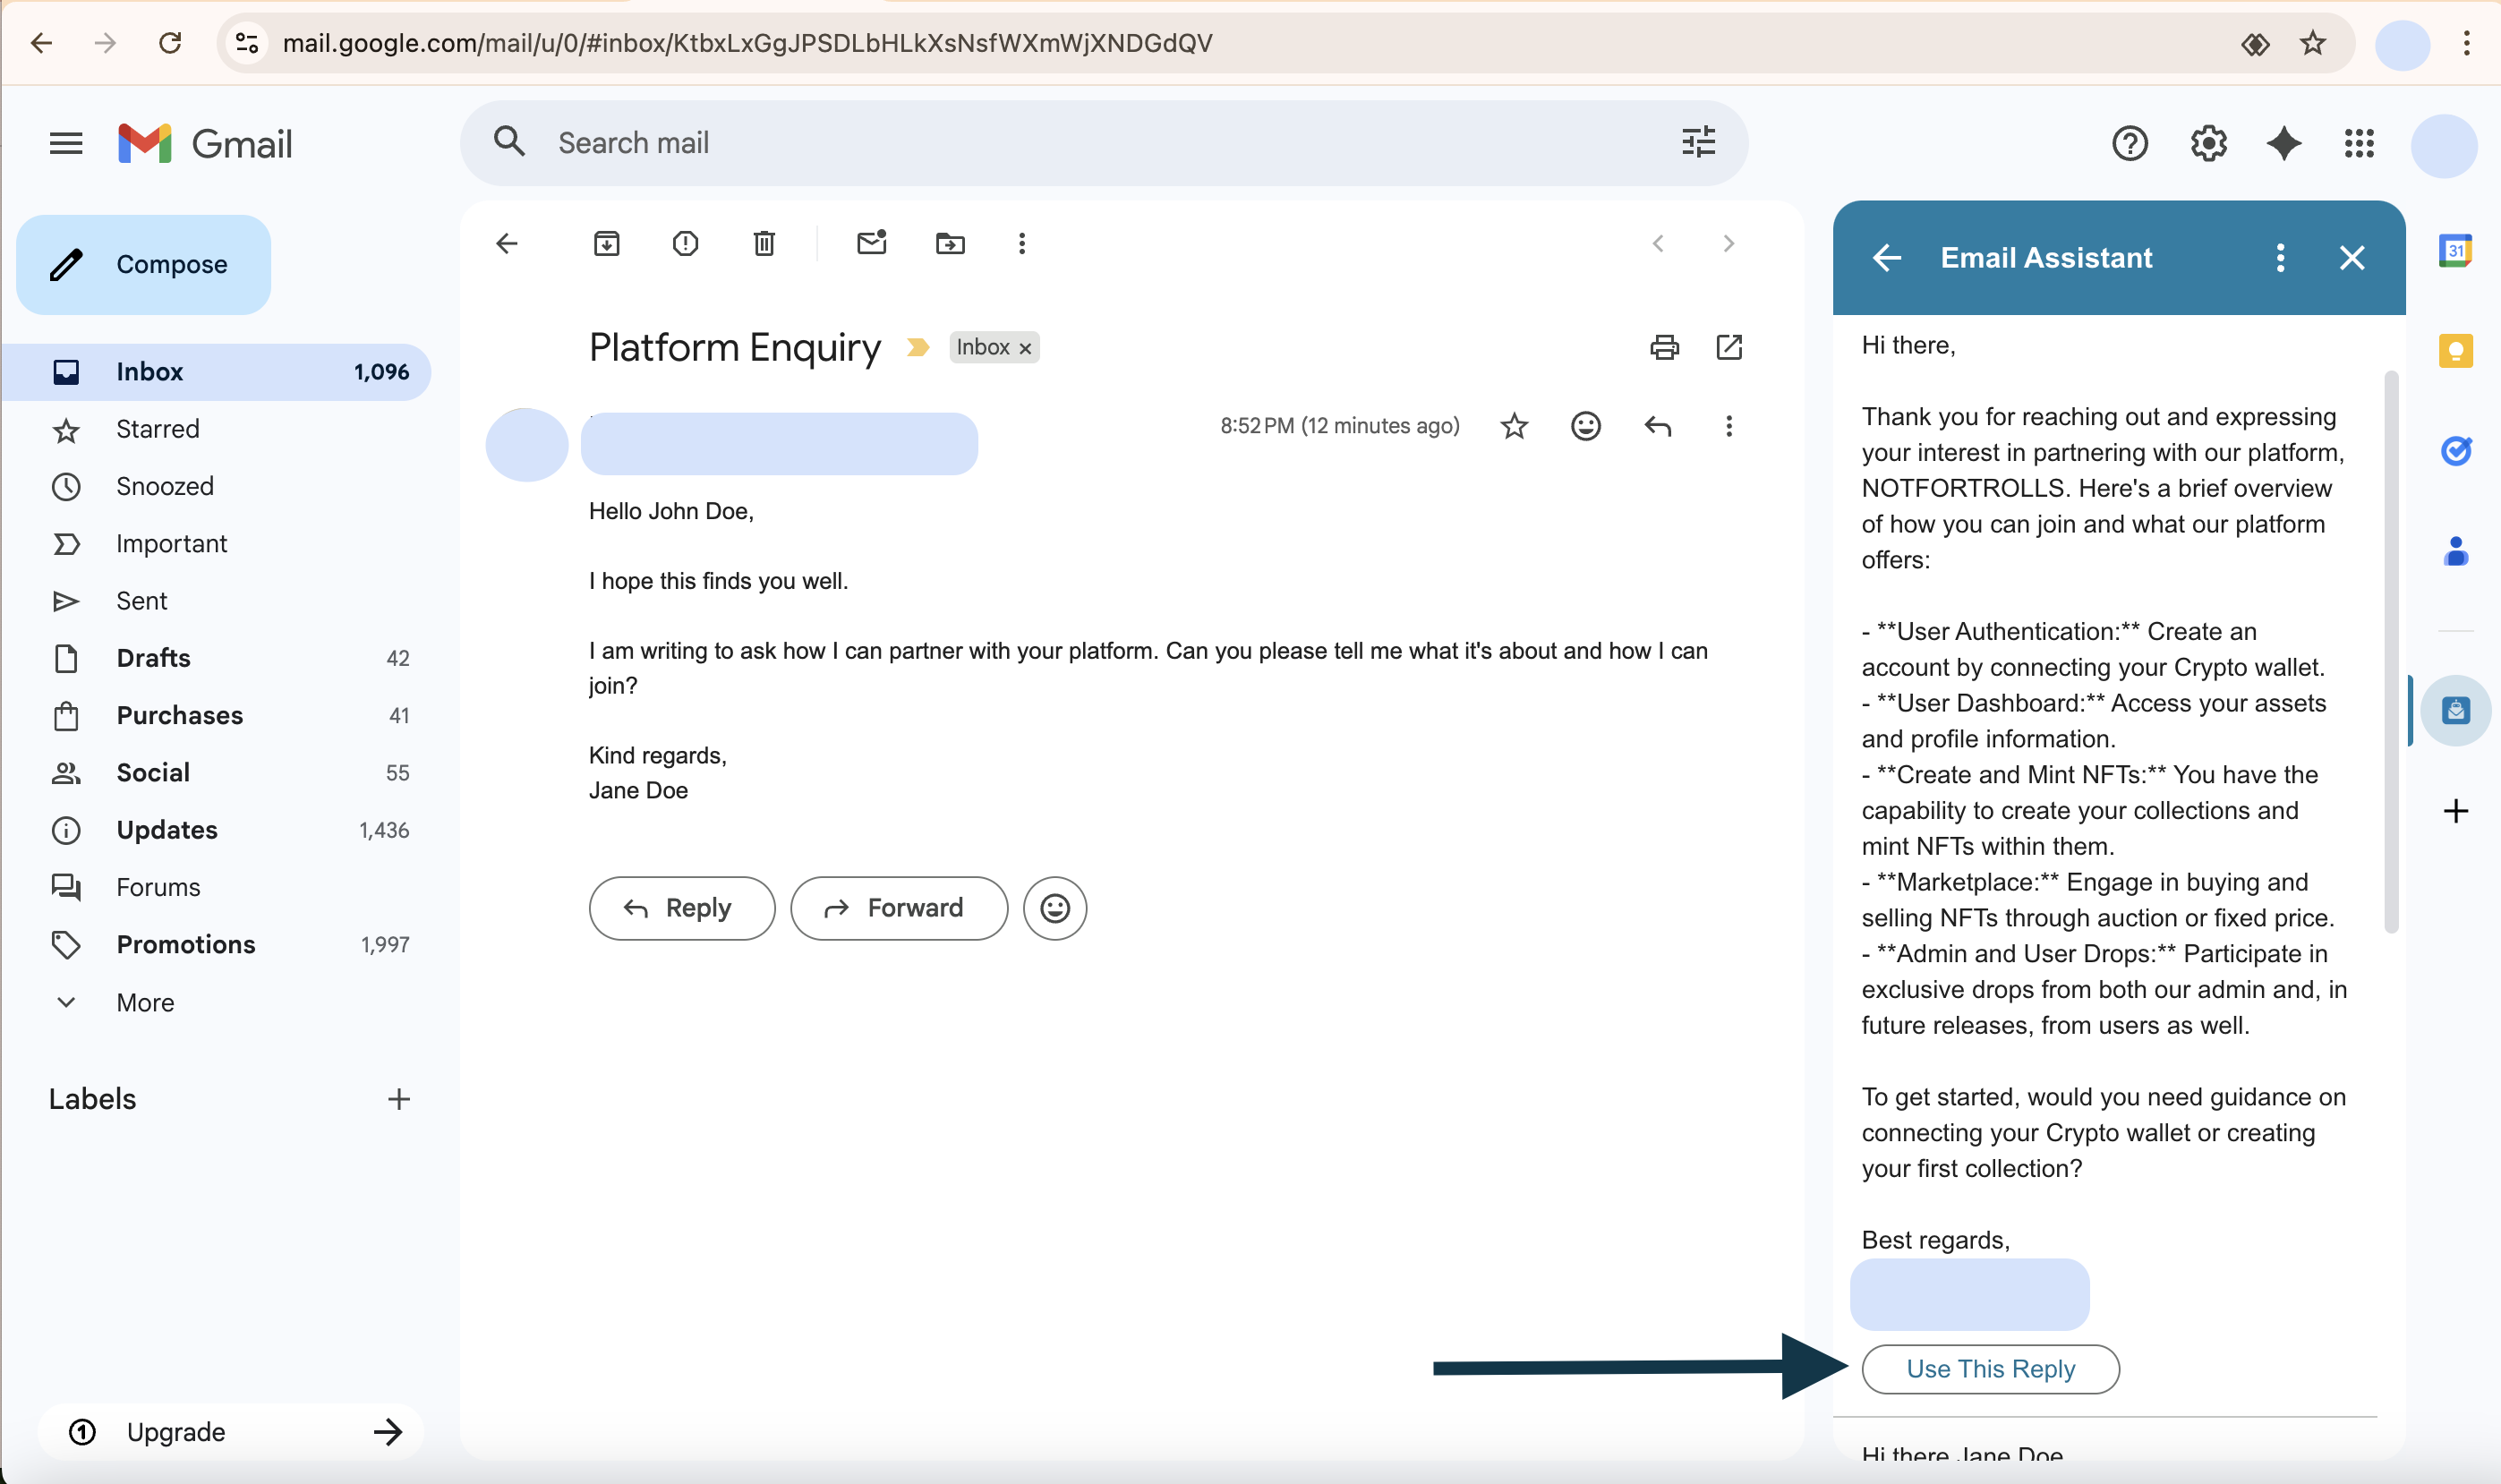
Step 5: Review Generated Responses
Using the context you provided in your back office Knowledge Base, the AI assistant will generate 2 response options as shown below. You can choose either response by clicking the "Use this reply" button for the one you prefer.
Step 6: Copy and Paste Response
After selecting a response, the add-on will add the selected response to a text field as shown below. You can then copy the text and paste it into your Gmail message box to reply.
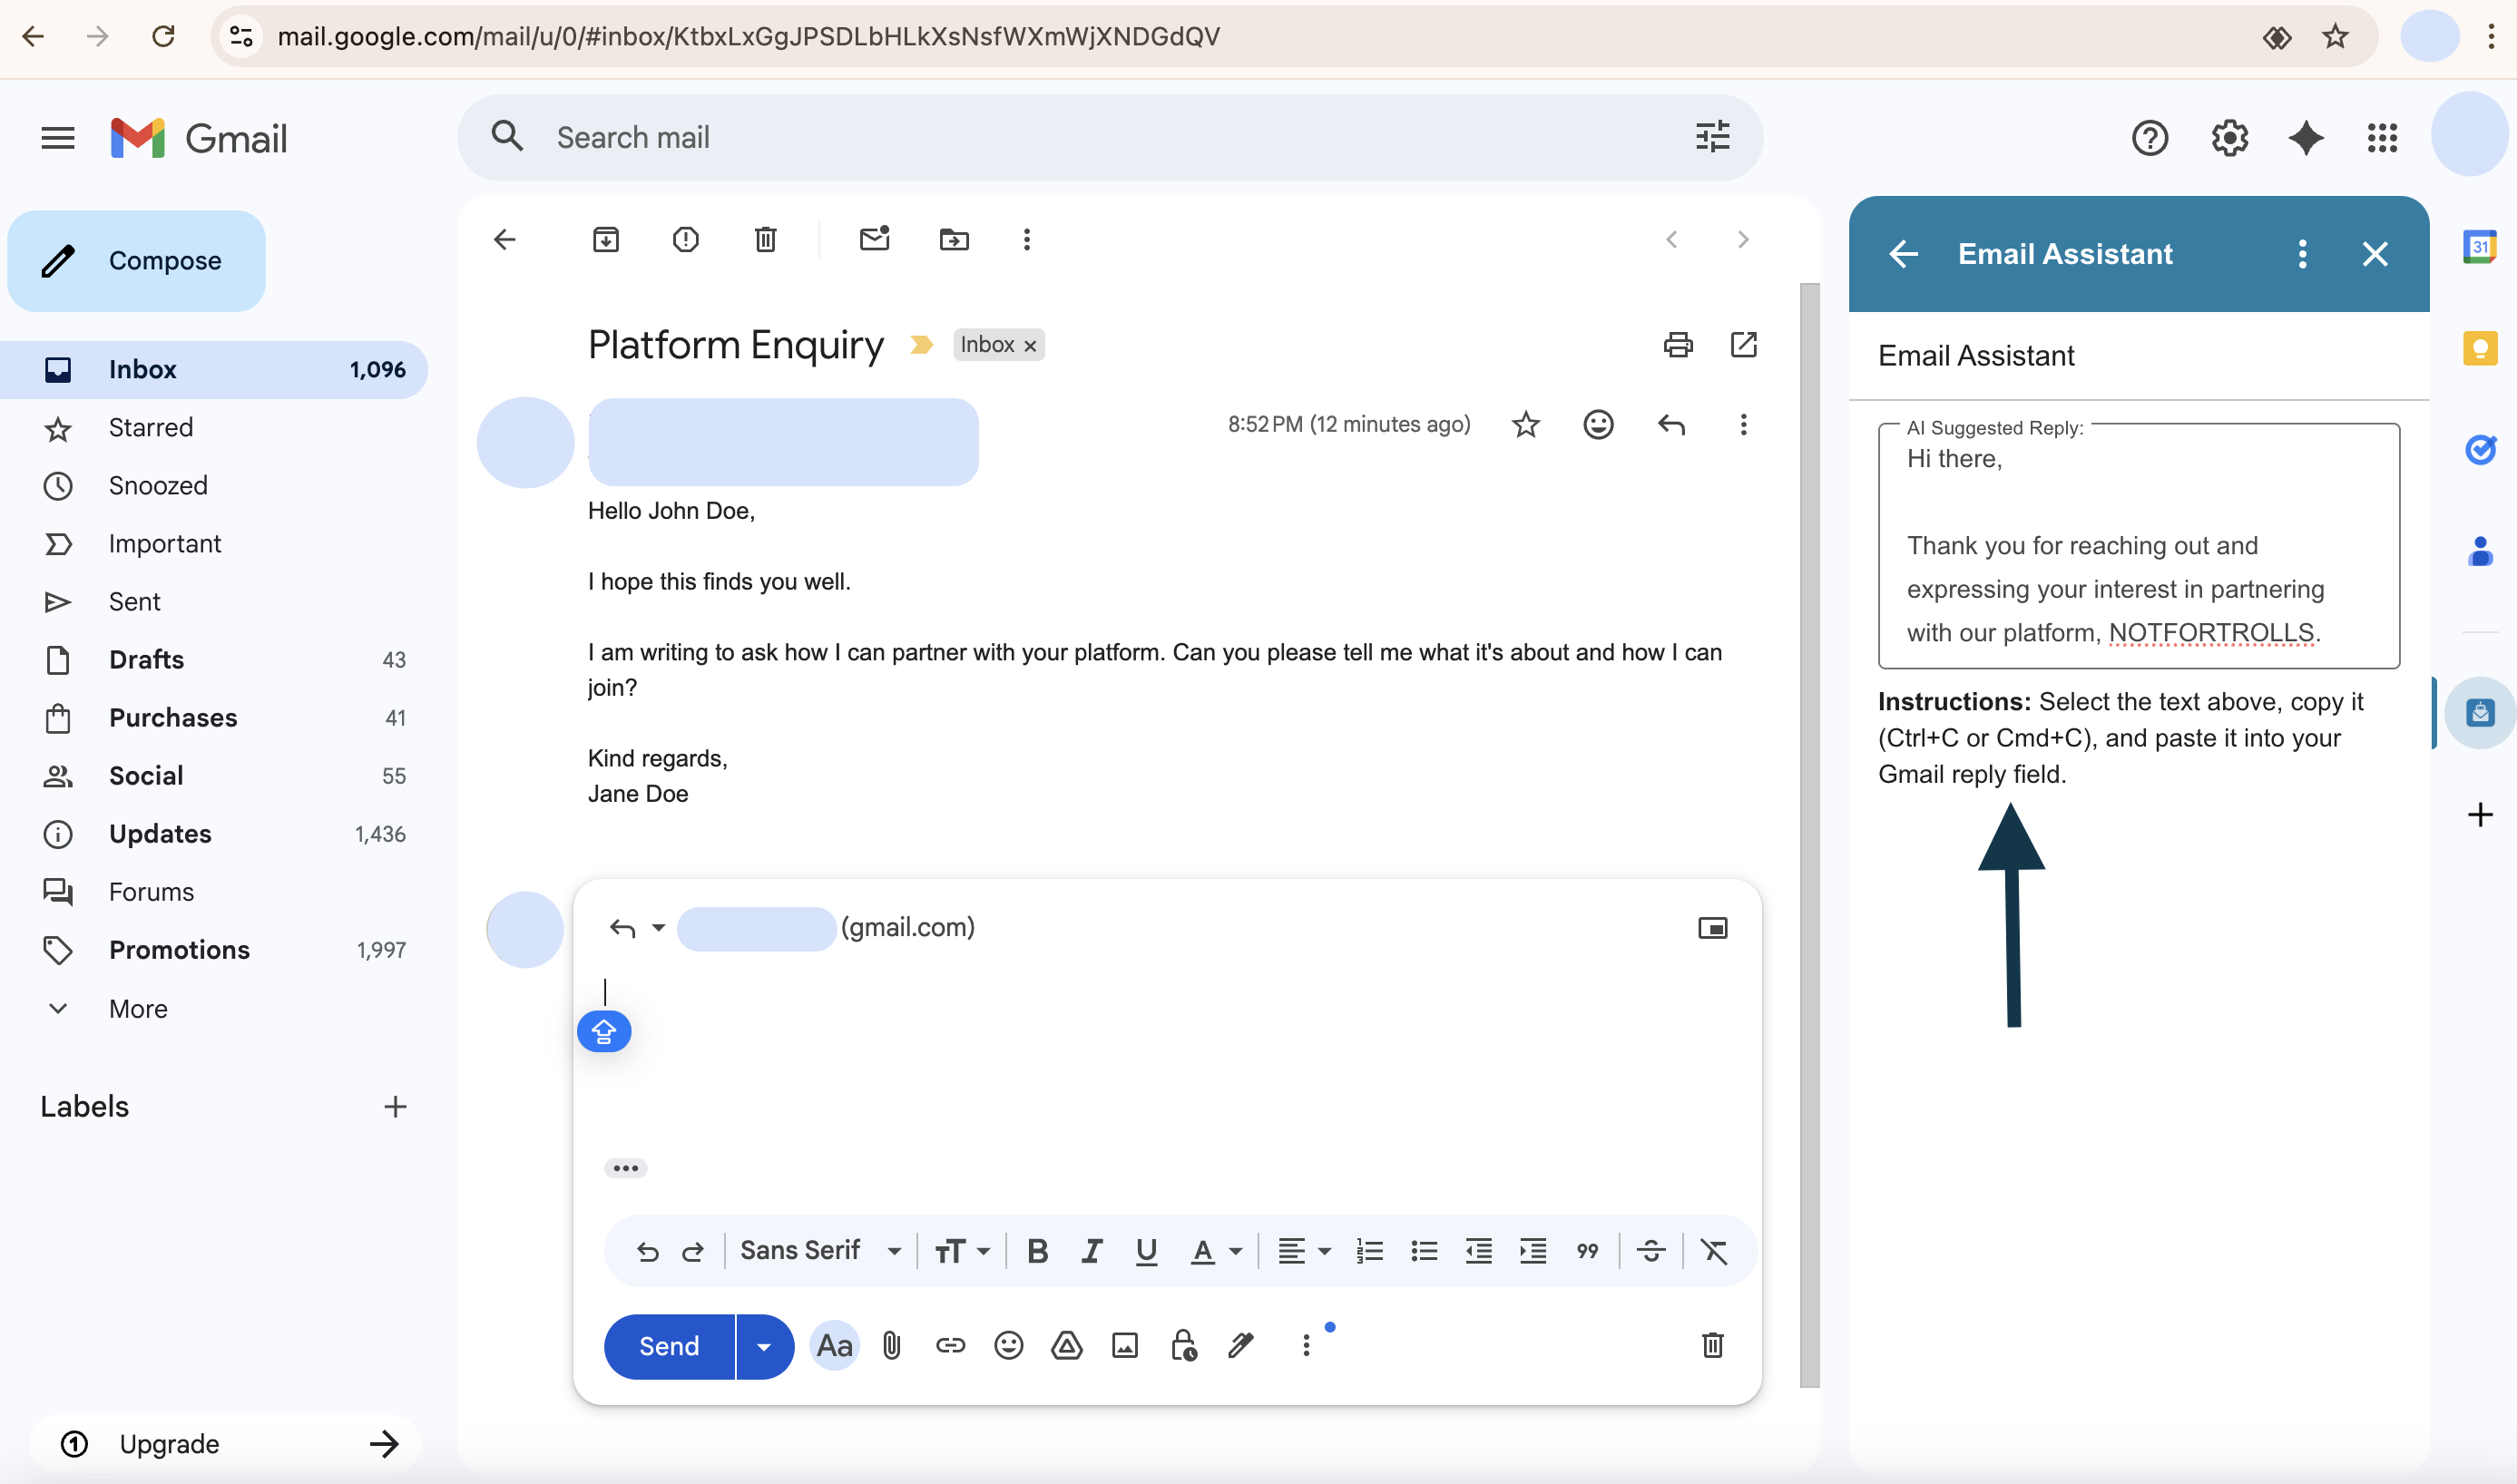
That's it! You've successfully generated and used an AI-powered email response. The AI uses the context from your Knowledge Base to ensure the responses are accurate and relevant to your business.
Support
Get help and report issues during the testing phase
Note: Email Assistant is currently in the testing phase. During this period, support resources are simplified and focused on collecting feedback and addressing issues.
Contact Support
For support, questions, or to report any issues you encounter, please contact us via email:
Email: ussybells@gmail.com
Reporting Issues
If you encounter any problems while using Email Assistant, please report them to the email address above. Include the following information when reporting issues:
- Description of the issue
- Steps to reproduce (if applicable)
- Screenshots (if helpful)
- Browser and system information
Your feedback is valuable in helping us improve Email Assistant during this testing phase.